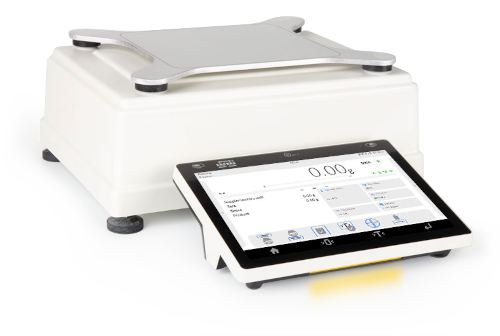
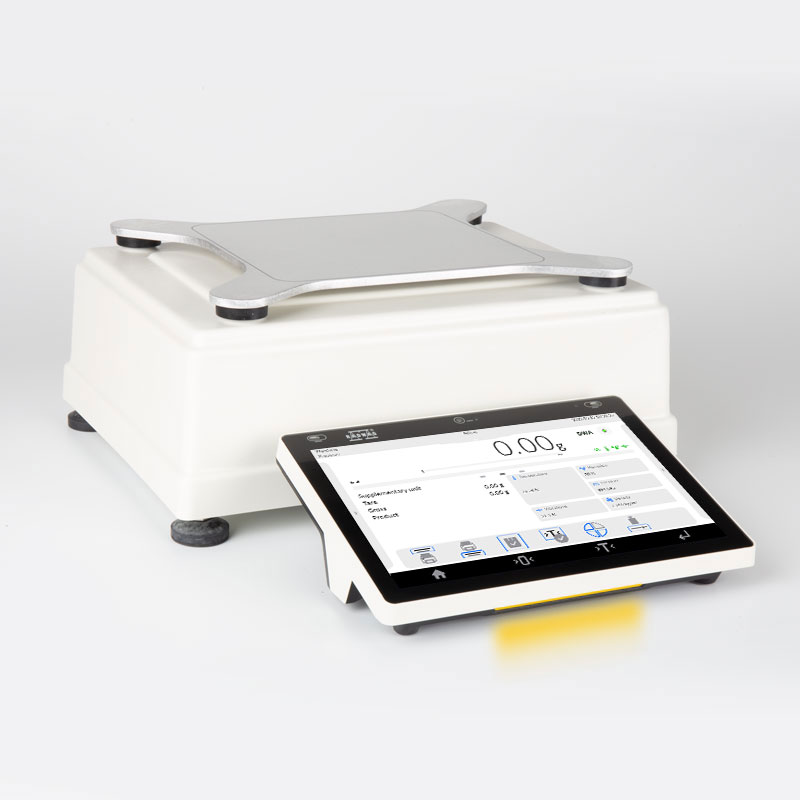
5Y.10.PM Precision Balance

Radwag – Laboratory and Industrial Weighing Solutions
Selected language English
5Y.10.PM Precision Balance
This image is for reference only.

5Y.10.PM Precision Balance

Product code: WL-224-0001
Change the model (8)
done
Max: 10kgd: 0,01g

 200×185mm
expand_more
Max: 15kgd: 0,01g

 200×185mm
Max: 20kgd: 0,01g

 200×185mm
Max: 25kgd: 0,1g

 350×260mm
Max: 35kgd: 0,1g

 350×260mm
Max: 50kgd: 0,1g

 350×260mm
Max: 60kgd: 0,1g

 400×500mm
Max: 120kgd: 0,2g

 400×500mm
Maximum capacity [Max]: 10 kg
Readability [d]: 0.01 g

close
Change the model:
5Y.10.PM Precision Balance
5Y.15.PM Precision Balance
5Y.20.PM Precision Balance
5Y.25.PM Precision Balance
5Y.35.PM Precision Balance
5Y.50.PM Precision Balance
5Y.60.PM Precision Balance
5Y.120.PM Precision Balance
Select all
Show me
Download
Add to compare Advanced search
Overview
Fast and Stable Measurement
It only takes a second for the balance to display the final measurement result.


Weighing Heavy Loads with High Accuracy

On the large weighing pan of a PM balance, you can weigh a load of 120 kg with a readability of 0.2 g and second-to-none repeatability.


Minimum Eccentricity Error Over the Entire Range

PM balances can be used to determine the mass of irregularly shaped components with a centre of gravity that is significantly shifted from the weighing pan axis.


Parameter Stability Over Time and After Transport

The mechanical design is resistant and robust, allowing you to maintain the correct metrological parameters after transport and despite long and intensive use.


Weighing Pan Dimensions Adapted to the Accuracy of the Balance

Weigh with the highest readability of 0.01 g on the 200 x 185 mm weighing pan and with a readability of 0.2 g on the 500 x 400 mm weighing pan.


21 CFR Part 11

Do you work in the pharmaceutical industry? Do you need a digital signature?
 
We are offering the laboratory balance which as a standalone fully meets the requirements of 21 CFR Part 11/ EU GMP Annex 11.
 
- Full data security
- Electronic signatures
- Validations
- Electronic records
- Audit trails


New, lmproved 

 
The new, taller and larger

MONO

BLOCK®

 
enables the best repeatability and speed
 
in its class of weighing platforms.


5Y Terminal
 
With Terminal 5Y you get a 10-inch display, Digital Weighing Auditor, multi-step user

verification, ambient light alerts, hotspot, RFID*, live note voice and text notes, voice commands

for the balance and handy measurement history within the handy library widgets


Modbus TCP/IP

is one of the most popular communication protocols in industrial automation. Implementing it in the 5Y balances and CY10 scales makes the devices of this series friendly to automation integrators. 
 
A balance or scale in a Modbus system is a slave device and performs tasks specified by the master device which is most often a PLC. Protocol Modbus TCP/IP in the 5Y balances and C10 scales enables, among other things, the realization of mass readout, zeroing and tare functions of the device, as well as tare settings and MIN and MAX thresholds.


Under-pan weighing
Weighing instruments purchased after 15th February 2023 will allow under-pan weighing at any time after the purchase. All you need to do is just to order a dedicated hook.
 
THBR 2.0 System
Cooperation with THBR 2.0 System for ambient conditions monitoring.
 
 
* RFID ISO/IEC 14443 Type A, 13,56 MHz

Check the price in our store

radwaguk.com

Buying from the producer is all about the pros

 
✓ Update as standard

You always get the latest version of the device and software. We are constantly improving our products.

✓ This is priceless

Technical support from the product developers. Who better to know the answers to your questions? Like our Facebook – profile – stay in touch with us.

✓ Smaller carbon footprint

A solidly packaged shipment travels only one way – the one to you.

✓ Long life for your balance

In our permanent offer you will find accessories for our balances and scales, such as cables, weighing pans and power supplies, as well as all spare parts. And we carry out legalization and periodic inspections in our laboratory.

✓ The important thing

You buy a product developed and manufactured in Europe – you get a device with a certain standard of compliance.

Datasheet
Maximum capacity [Max]

10

 kg

Minimum load

0.5

 g

Readability [d]

0.01

 g

Verification unit [e]

0.1

 g

Tare range

-10

 kg

Minimum weight (USP)

8.2

 g

Minimum weight (U=1%,k=2)

0.82

 g

Repeatability (Max)

0.01

 g

Repeatability (5% Max)

0.004

 g

Linearity

±0.025

 g

Stabilization time

1

 s

Adjustment

internal (automatic)


OIML Class

II


Leveling system

semi-automatic – LevelSENSING


Display

10″ graphic colour touchscreen


Weighing pan dimensions

200×185

 mm

Packaging dimensions

520×520×280

 mm

Net weight

12.96

 kg

Gross weight

14.2

 kg

Protection class

IP 43


Communication interface

2×USB-A, USB-C, HDMI, Ethernet, Wi-Fi®, Hotspot


Power supply

Adapter: 100 – 240V AC 50/60Hz 1A; 15V DC 2.4A
Balance: 12 – 15V DC 1.6A max; 10–19W*


Operating temperature

+10 – +40

 °C

CE
Verification Extra payment
for verification

Repeatability is expressed as a standard deviation from 10 cycles of mass standard weighing.
Stabilization time dependson the ambient conditions and the dynamics of weighing pan loading; specified for FAST profile.
*Power consumption depends on the terminal configuration and the number and type of external devices connected.

360°

Videos
5Y Functions: Animal Weighing
5Y Functions: Statistics
5Y Functions: DWA®
5Y Balance and Barcode Scanner – Easy Connection
5Y Functions: Checkweighing
5Y Functions: Dosing
5Y Functions: Formulations
Percentage deviations
5Y Functions: Weighing
5Y Functions: Parts counting
5Y Functions: Proximity Sensors – Touch-Free Control (Tutorial)
5Y Functions: GLP Procedures – Objective Documentation of Measurements (Tutorial)
Weighing Printout Design in Analytical and Precision Balances (Tutorial)
Easy Printing with Wi-Fi® Thermal Receipt Printer by RADWAG.
ELLIPSIS – New Balance by RADWAG
ELLIPSIS – Cutting Edge, Innovative, New
Talk to it. Voice Commands in New ELLIPSIS Balance by RADWAG
310 ELLIPSIS – Scan or Tap to Log In
Remote VPN Support on ELLIPSIS Balances
ELLIPSIS – Unlimited Connections
Connecting RADWAG RTP-UEW80 Printer via Wi-Fi® (Tutorial)
PM 5Y Balances – Laboratory Precision Under Industrial Conditions
RTP - The First Receipt Printer of RADWAG Production!
Complete Solutions for Mass Measurement in Pharma Industry
New AS and PS 5Y Balances – Autotest (Tutorial)
Functions
Autotest

Autotest

Diagnostic function aiming at metrological parameters determination (repeatability), the parameters are determined for the actual conditions of use. When speaking of repeatability it may be also used for weighing time optimization. Autotest is operated in an automatic mode thus operator’s time is saved.
Dosing

Dosing

Weighing process for which reference mass has been determined together with tolerance for its determination. Dosing tolerance is given in [%] and it is calculated in relation to the reference value thus being a permissible deviation of this process. This solution is used for weighing powders, liquids and loose materials. Dosing function performance is often supported with bargraph - load indicator. For industrial scales it is possible to use a control systems of dosing process.
Percent Weighing

Percent Weighing

Percent Weighing function is used for comparision of measured products with mass standard. Mass of a mass standard may be a numeric value taken from a database or it may be determined through a measurement process. Each measured product is compared to mass standard, mass of which is presumed as a model 100% ideal mass. For products weighing less than the mass standard, obtained results are lower than 100%, for products weighing more, the obtained results are greatly  exceeded.
Parts counting

Parts counting

Function using mass measurement for determination of  measured items quantity. Mass of a single item is required for this process. It may be either estimated through weighment or taken from a database. For items counting the following algorithm is used: all items mass / single item mass = quantity. Function operation is supperted by a mechanism of Automatic Correction of Accuracy. This allows to update single item mass in course of the process. To a certain extend Automatic Correction of Accuracy eliminates error which may be a result of different mass values of seemingly alike single elements. For industry solutions items counting may be simultaneously carried out with checkweighing and dosing thus industry solutions feature audio signalling base informing that specified number of items has been weighed. It is possible to apply weighing systems using few platfroms of different MAX capacities and different accuracies.
Peak hold

Peak hold

Function registering the greatest temporary indication occurring in course of the weighing process. It is most often used in medical scales in order to hold the measurement indication.
Formulation

Formulation

Function supporting the mixture making process, wherein the mixture contains various components. Formulation function usually uses the balance/scale database of components. Formulation serves for monitored checkweighing of every single component with a given tolerance. It is enriched with a set of individual settings.
Statistics

Statistics

Statistiscs function registers and analyses performed measurements. This supplies the user withthe following information: Max and Min standard deviation, average value, variance, range et.
Checkweighing

Checkweighing

Checkweighing function is used for checking whether the measured sample mass is within the predefined threshold values, Low [LO] and Hgh [HI]. The thresholds are given in [g] and [kg] units. Current state of a sample being measured is signalled by means of pictorgams located on a display for laboratory balances, for industrial scales Stackligt System is used. This visual +/- inspection is in operation during segregation, control or packing process of products for which mass has bees determined with a specifaied tolerance, eg. 12860 g 961
IR sensors

IR sensors

Programmable function supporting the weighing process through control of the following options: sliding weighing chamber doors, printout, zeroing, tarring etc. Especially appreciated wherever preventing the balance from soiling is important.
Under-pan weighing

Under-pan weighing

The solution enables weighing with use of a stand, which is advisable for loads of non-standard shapes and dimensions and those that generate magnetic field.
GLP Procedures

GLP Procedures

Diagnostic function allowing to objectively document performed measurements. GLP procedures may be either presented in a short report form or extended one.
Animal weighing

Animal weighing

Process of mass determination for a product which may unwillingly reposition within the weighing pan. Mass determination in such cases requires much longer period of time when compared to typical weighing process. It is the user who defines period of time needed for control of measured product mass. The user can thus optimize the function depending on the measured product characteristics.
Pipettes Calibration

Pipettes Calibration

Function verifying correctness of piston pipettes functioning, the verification is performed via gravimetric measurement of the excreted liquid. Pipettes calibration may be either a stand-alone module or it may be operated
Air density correction

Air density correction

Function performing correction of mass measurement indication, wherein the air density is taken into account. It is used in balances with reading unit < 0,01 mg.
Density determination

Density determination

Liquid or solid body density function uses the Archimedes principle and it requires a special kit to be applied. The kit when used, replaces a weighing pan. For solids mass of the sample must be determined first in the air, next in the liquid of specified density. For liquids the so called sinker, density of which has been determined, must be measured first in the air, next in the tested liquid. The density determination process is disturbed by air bubbles which may stick either to the measured sample or the sinker. In case of laboratory equipment very light solids may be measured. For industry, solid bodies density may be determined by means of  under-pan weighing. Tested load of significant size may be measured this way.
Differential weighing

Differential weighing

Differential weighing informs about mass variation a particular sample, wherein the said variation is a result of manufacturing processes.

Differential weighing is often applied in product control process, for which reference product parameters have been specified in order to be used as a source of comparison for the whole series.
Insuchcasestandard deviation is the information which tells about quality and completeness of a final product. For systems based on a feed-back technique such information may be used by control units.
Ambient conditions monitoring

Ambient conditions monitoring

The possibility of cooperation with the THBR 2.0 system
Statistical Quality Control

Statistical Quality Control

Statistical control for determination of basic statistical criteria: maximum, minimum, standard deviation, mean values for each batch, etc.
Packaged Goods Control

Packaged Goods Control

Pre-packaged Goods Control mode enables to collect weighings from RADWAG-designed weighing instruments, carry out control and generate PGC reports. Different types of weighing instruments can be combined into a network. The control can be started on a balance or via computer software. It is automatically finished after a respective quantity of packages is verified.
Collected data allows you to assess quality of produced pre-packaged goods and their conformity with:
- internal quality control system;
- 'Pre-Packaged Goods' regulation of 7th May 2009 (Journal of Laws No 91, item 740), on the requirements concerning quantity inspection of pre-packaged goods control, which inspection is to be carried out by means of random selection of the measurements results and sending those results to pre-packaged goods control procedure.
ALIBI Memory

ALIBI Memory

"ALIBI" memory enables saving and storing up to 100000 measurements.  Measurements are saved automatically upon each pressing of the key. There is no need for any additional operations or changing settings.
The following data related with the measurements is saved: measurement date; measurement time; result (mass); tare value; operator carrying out the measurement (logged in); product name.
The software saves the measurement in a so called loop, i.e. when the measurement no. 100001 is saved, the measurement 1 gets automatically deleted from the memory.
Measurements saved to balance memory cannot be deleted.
You can preview and print out the data saved to the ALIBI database.
Wi-Fi®

Wi-Fi®

Thanks to wireless communication between the computer and a balance, it is possible to use a balance inside a laminar flow hood and a fume cupboard.

Documentation
Datasheet
Data Sheet Data Sheet
Data Sheet

Show me
Show me
Download
Download

Choose more product:
Show me Show me DownloadDownload
User Manuals
User Manual
User Manual
Show me
Show me
Download
Download
(2.36 MB)
User Manual
User Manual
Show me
Show me
Download
Download
(1.24 MB)
Software Manual
Software Manual
Show me
Show me
Download
Download
(1.23 MB)
User Manual
User Manual
Show me
Show me
Download
Download
(13.23 MB)
Software Manual
Software Manual
Show me
Show me
Download
Download
(0.95 MB)
Start Up Guide
Start Up Guide
Show me
Show me
Download
Download
(5.55 MB)
Conformity Declarations
Conformity Declaration
Show me
Show me
Download
Download
(0.04 MB)
Publications and Brochures
Laboratory balance cleaning
Show me
Show me
Download
Download
(2.52 MB)
RTP Thermal Receipt Printer
Show me
Show me
Download
Download
(1.64 MB)
PM Precision Balances
Show me
Show me
Download
Download
(5.47 MB)
RFID
RFID
Show me
Show me
Download
Download
(0.68 MB)
Hybrid Protective Glass
Show me
Show me
Download
Download
(1.86 MB)
Micro Scale Measurement
Show me
Show me
Download
Download
(2.74 MB)
Laboratory Balances
Laboratory Balances
Show me
Show me
Download
Download
(1.68 MB)
Metrology in the laboratory 2024
Show me
Show me
Download
Download
(5.65 MB)
ELLIPSIS 5Y Laboratory Balances
Show me
Show me
Download
Download
(33.90 MB)
Accessories
Additional modules

RES Radwag Extended SI Module3
21 CFR Part 11 Compliance Module3

Radwag Balances and Scales
Torunska 5
26-600 Radom
Poland
tel.: +48 48 386 60 00
e-mail: export@radwag.com
TIN: PL7960000327
Vimeo Radwag YouTube Radwag Facebook Radwag LinkedIn Radwag
© 2024 RADWAG Balances and Scales. All rights reserved.

Select language

×
Change language AlbanianAlbanian
Change language DanishDanish
Change language NederlandseNederlandse
Change language EstonianEstonian
Change language FinnishFinnish
Change language HungarianHungarian
Change language IcelandicIcelandic
Change language KazakhKazakh
Change language LatvianLatvian
Change language LithuanianLithuanian
Change language MacedonianMacedonian
Change language NorwegianNorwegian
Change language PortuguesePortuguese
Change language RomanianRomanian
Change language RussianRussian
Change language SlovakSlovak
Change language SlovenianSlovenian
Change language SwedishSwedish
Change language UkrainianUkrainian
Change language SerbianSerbian
Change language MontenegrinMontenegrin
Change language page on Deutsch Deutsch
Change language page on Español Español
Change language page on Français Français
Change language page on Italiano Italiano
Change language page on Polski Polski
Change language page on Türkiye Türkiye
Česky
Português (Brasil)
Change website to USA USA
Change language page on 中文 中文
Presentations Presentations Presentations
Subscribe Subscribe Subscribe
Radwag in Facebook Radwag in Facebook Facebook
Radwag in YouTube Radwag in YouTube Youtube
Radwag in Vimeo Radwag in Vimeo Vimeo
Radwag in LinkedIn Radwag in LinkedIn LinkedIn
Webinars Radwag Webinars Radwag Webinars
close
E-mail:
Company name:
Name:
I consent to the processing of my personal data for marketing purposes by Radwag Wagi Elektroniczne Witold Lewandowski.
I consent to receive marketing and product-related messages by electronic means from Radwag Wagi Elektroniczne Witold Lewandowski.
I have read the Privacy Policy of RADWAG Wagi Elektroniczne Witold Lewandowski.
lock_openI want to access the files
close
Slide to go back ↩