XA 21/52.5Y.M.A.P Microbalance

 1 
 2 
 3 
 Compare 
Radwag – Laboratory and Industrial Weighing Solutions
Selected language English
Obraz
This image is for reference only.
arrow_forward_ios
arrow_forward_ios

XA 21/52.5Y.M.A.P Microbalance

Product code: WL-112-1001
Change the model (5)
done
Max: 21 / 52gd: 1 / 5µg

 ø26mm
expand_more
Max: 6 / 21gd: 1 / 2µg

 ø26mm
Max: 21gd: 1µg

 ø26mm
Max: 52gd: 5µg

 ø26mm
Max: 53gd: 1µg

 ø26mm
Maximum capacity [Max]: 21 / 52 g
Readability [d]: 1 / 5 µg

close
Change the model:
XA 6/21.5Y.M.A.P Microbalance
XA 21/52.5Y.M.A.P Microbalance
XA 21.5Y.M.A.P Microbalance
XA 52.5Y.M.A.P Microbalance
XA 53.5Y.M.A.P Microbalance
Select all
Add to compare Advanced search
Overview

XA 21/52.5Y.M.A.P Microbalance
for Pipettes Calibration
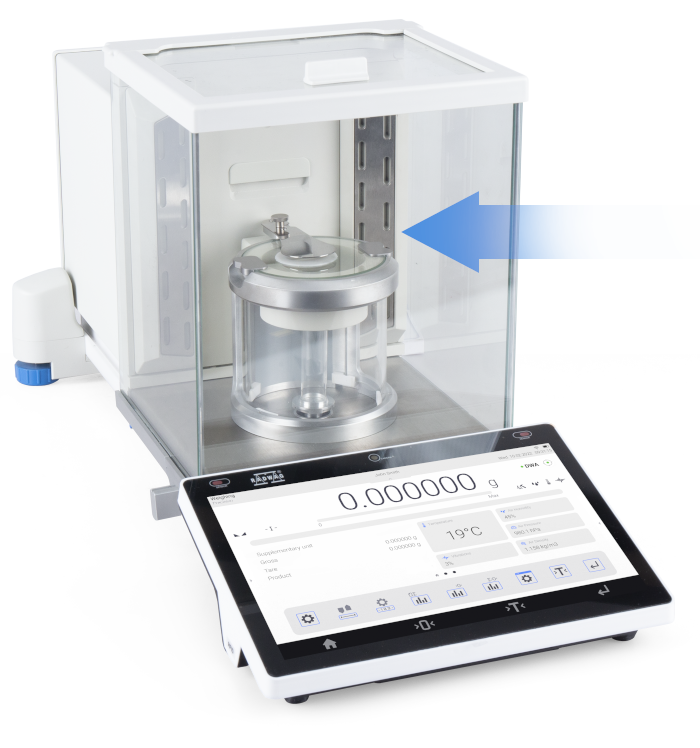
 
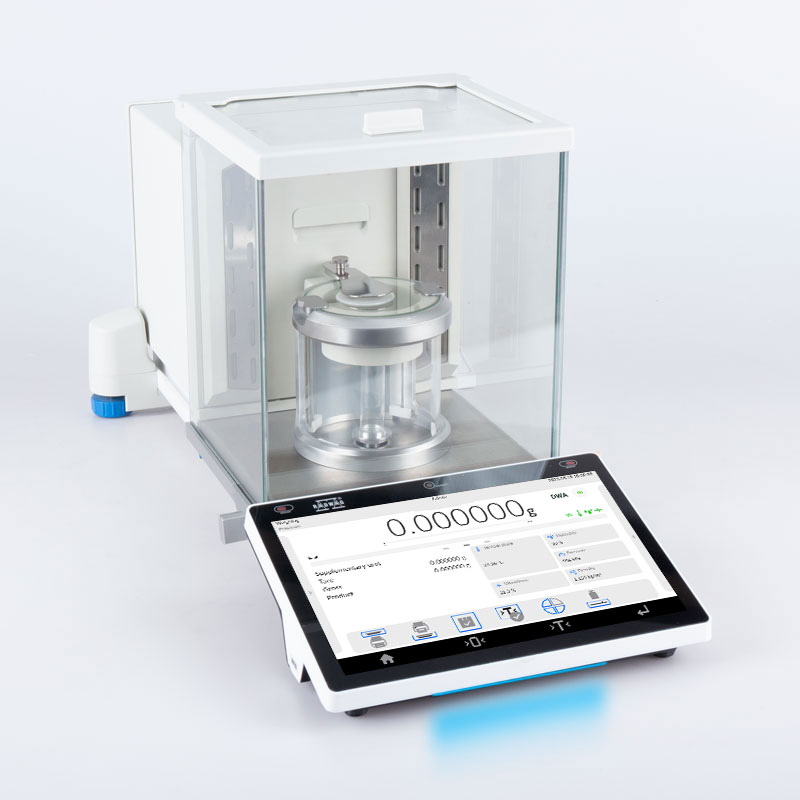
XA 5Y.M.A.P Microbalances are designed to calibrate single-channel pipettes from 0.5 µl. Pipette calibration means checking whether the pipette draws as much as it should, and thus whether the measurement result is within the permissible error. XA 5Y.M.A.P Microbalances have the same features as the XA 5Y.M.A Microbalances, but since they are dedicated to pipette calibration, they are additionally equipped with an automatic pipette calibration adapter, including a pipette calibration adapter, an evaporation ring and a glass vessel (we have listed all the components of the calibration adapter below, next to the datasheet).


Fully Antistatic Weighing Chamber

The XA 5Y.M.A.P Microbalances has a built-in antistatic ionizer and an automatically opened weighing chamber. The built-in antistatic ionizer neutralizes the electrostatic charge of the sample during each weighing procedure, that is, each time the chamber is opened. The automatically opened weighing chamber is controlled by gestures, i.e. non-contact.


Do you need a balance that not only determines weight with impressive accuracy, but also performs a digital audit, responds to your voice commands and sends you light messages?
 
 
If so, learn about the functionality of the ELLIPSIS series of balances:


Digital Weighing Auditor

Ensures that your balance is ready for use. It enables air buoyancy compensation in real-time. What is more, it informs about the need for a balance inspection or a periodic audit of the balance’s accuracy and sensitivity.


10-Inch Display

Bigger screen – 10’’ – means more information in one place. On the new ELLIPSIS terminal, you will see up to 3 screens, widgets, graphs, statusesnoteshandy measurement history.


Ambient Light – An Innovative Way for the Balance to Communicate With the User

The light colour will tell you about status, process results, procedures, or alerts.


Uncompromising User Verification

For the first time ever, the balance will verify the user using a password, RFID cardfingerprint readerfacial recognition mechanism, or any combination of these.


Hotspot

Use the balance on any device connected to it. This can be a smartphone, tablet, or computer.


Live Note – Note Down Your Conclusions

It’s the first time you can add a voice memo to a measurement series or procedure report. If you prefer to write it down, ELLIPSIS allows you to add a text note.


RFID

ELLIPSIS works with RFID tags* that can be used to tag your products or formulation ingredients in the database. They can also be used to identify a user.


Handy Library

This is where a series of recent measurements or a report ready for digital signature, according to 21 CFR Part 11, can be found.


Widgets

Prepared to display what you need most at any given moment.


Smart Min Weight

The balance displays whether the value of the weight you want to weigh is below or above the minimum weight threshold.


Automatic Leveling of the Balance ReflexLEVEL System

Instead of manually leveling your scale - level it automatically.
The ReflexLEVEL System saves you time and gives you maximum precision in your measurements.


21 CFR Part 11

Do you work in the pharmaceutical industry? Do you need a digital signature?

We are offering the laboratory balance which as a standalone fully meets the requirements of 21 CFR Part 11/ EU GMP Annex 11.
 
 Full data security
 Electronic signatures
 Validations
 Electronic records
 Audit trails 


Modbus TCP/IP

is one of the most popular communication protocols in industrial automation. Implementing it in the 5Y balances and CY10 scales makes the devices of this series friendly to automation integrators. 
 
A balance or scale in a Modbus system is a slave device and performs tasks specified by the master device which is most often a PLC. Protocol Modbus TCP/IP in the 5Y balances and C10 scales enables, among other things, the realization of mass readout, zeroing and tare functions of the device, as well as tare settings and MIN and MAX thresholds.


Two-point adjustment

Adjacency, which takes place at two measurement points instead of one, improves measurement precision over the full weighing range. And what does this mean for you? More accurate measurement.
 
 
* RFID ISO/IEC 14443 Type A, 13.56 MHz


Check the price in our store

radwaguk.com

Buying from the producer is all about the pros

 
✓ Update as standard

You always get the latest version of the device and software. We are constantly improving our products.

✓ This is priceless

Technical support from the product developers. Who better to know the answers to your questions? Like our Facebook – profile – stay in touch with us.

✓ Smaller carbon footprint

A solidly packaged shipment travels only one way – the one to you.

✓ Long life for your balance

In our permanent offer you will find accessories for our balances and scales, such as cables, weighing pans and power supplies, as well as all spare parts. And we carry out legalization and periodic inspections in our laboratory.

✓ The important thing

You buy a product developed and manufactured in Europe – you get a device with a certain standard of compliance.

Datasheet
Metrological parameters
Physical parameters
Construction
Communication interface
Electrical parameters
Environmental conditions
Maximum capacity [Max]

21 / 52

 g

Minimum load

0.1

 mg

Readability [d]

1 / 5

 µg

Verification unit [e]

1

 mg

Tare range

-52

 g

Standard repeatability [5% Max]

1.5

 µg

Standard repeatability [Max]

6

 µg

Standard minimum weight (USP)

3

 mg

Standard minimum weight (U=1%, k=2)

0.3

 mg

Permissible repeatability [5% Max]

2.4

 µg

Permissible repeatability [Max]

8

 µg

Linearity

±20

 µg

Eccentric load deviation

20

 µg

Sensitivity time drift

1×10⁻⁶/Year×Rt


Stabilization time

~ 3.5

 s

Adjustment

internal (automatic)


OIML Class

I


Leveling system

automatic – Reflex Level System


Display

10″ graphic colour touchscreen


Weighing chamber doors

automatic


Delivery components

Microbalance, weighing pan, weighing pan shield, power supply, automatic pipette calibration adapter: (base, bottom ring, glass vessel, pipette calibration adapter, evaporation ring, weighing pan, glass lid, mechanical closing cover, protecting screw), brush, fabric dust cover.


Weighing chamber dimensions

199×170×217

 mm

Capacity

11 ml


Weighing pan dimensions

ø26

 mm

Packaging dimensions

750×492×595

 mm

Net weight

14.5

 kg

Gross weight

18.9

 kg

Protection class

IP 43


Communication interface

2×USB-A, USB-C, HDMI, Ethernet, Wi-Fi®, Hotspot


Power supply

Adapter: 100 – 240V AC 50/60Hz 1A; 15V DC 2.4A
Balance: 12 – 15V DC 1.4A max*


Operating temperature

+10 – +40

 °C

Operating temperature change rate

±0.3 °C / 1 h (±1 °C / 8 h)


Relative humidity

40% – 80%


Relative humidity change rate

±1% / h (±4% / 8 h)


CE
Verification Additional fee
for verification
5 years warranty
Wi-Fi® is a registered trademark of Wi-Fi Alliance®.
Repeatability is expressed as a standard deviation from 10 cycles of mass standard weighing.
Stabilization time depends on the ambient conditions and the dynamics of weighing pan loading; specified for FAST profile.
* The power supply can be connected to the socket on the back of the balance housing or to the terminal.
360°
Videos
Precision and Working Comfort – Operating RADWAG Balances in Every Glove!
5Y Functions: Animal Weighing
5Y Functions: Statistics
5Y Functions: DWA®
5Y Balance and Barcode Scanner – Easy Connection
New Menu Language in 5Y Series Balances: Japanese
5Y Functions: Checkweighing
5Y Functions: Dosing
5Y Functions: Formulations
Percentage deviations
5Y Functions: Weighing
5Y Functions: Parts counting
5Y Functions: Proximity Sensors – Touch-Free Control (Tutorial)
5Y Functions: GLP Procedures – Objective Documentation of Measurements (Tutorial)
Weighing Printout Design in Analytical and Precision Balances (Tutorial)
Easy Printing with Wi-Fi® Thermal Receipt Printer by RADWAG.
ELLIPSIS – New Balance by RADWAG
ELLIPSIS – Cutting Edge, Innovative, New
Talk to it. Voice Commands in New ELLIPSIS Balance by RADWAG
310 ELLIPSIS – Scan or Tap to Log In
Remote VPN Support on ELLIPSIS Balances
ELLIPSIS – Unlimited Connections
Connecting RADWAG RTP-UEW80 Printer via Wi-Fi® (Tutorial)
XA 5Y.M Unpacking and Installation (Tutorial)
RTP - The First Receipt Printer of RADWAG Production!
Complete Solutions for Mass Measurement in Pharma Industry
New AS and PS 5Y Balances – Autotest (Tutorial)
Functions
Autotest

Autotest

Diagnostic function aiming at metrological parameters determination (repeatability), the parameters are determined for the actual conditions of use. When speaking of repeatability it may be also used for weighing time optimization. Autotest is operated in an automatic mode thus operator’s time is saved.
Percent Weighing

Percent Weighing

Percent Weighing function is used for comparision of measured products with mass standard. Mass of a mass standard may be a numeric value taken from a database or it may be determined through a measurement process. Each measured product is compared to mass standard, mass of which is presumed as a model 100% ideal mass. For products weighing less than the mass standard, obtained results are lower than 100%, for products weighing more, the obtained results are greatly  exceeded.
Peak hold

Peak hold

Function registering the greatest temporary indication occurring in course of the weighing process. It is most often used in medical scales in order to hold the measurement indication.
Statistics

Statistics

Statistiscs function registers and analyses performed measurements. This supplies the user withthe following information: Max and Min standard deviation, average value, variance, range et.
IR sensors

IR sensors

Programmable function supporting the weighing process through control of the following options: sliding weighing chamber doors, printout, zeroing, tarring etc. Especially appreciated wherever preventing the balance from soiling is important.
GLP Procedures

GLP Procedures

Diagnostic function allowing to objectively document performed measurements. GLP procedures may be either presented in a short report form or extended one.
Pipettes Calibration

Pipettes Calibration

Function verifying correctness of piston pipettes functioning, the verification is performed via gravimetric measurement of the excreted liquid. Pipettes calibration may be either a stand-alone module or it may be operated
Air density correction

Air density correction

Function performing correction of mass measurement indication, wherein the air density is taken into account. It is used in balances with reading unit < 0,01 mg.
Automatic sliding door

Automatic sliding door

Automatic side panes opened via touch-free IR sensors.
Moveable range

Moveable range

Dual range analytical balances can be equipped with much more precise measuring range but only in very limited part of max capacity and only from zero load. A new technology introduced by RADWAG allows for moving this limited range till max capacity of the balance is reached. Such solution has been named as: Moveable range.
Differential weighing

Differential weighing

Differential weighing informs about mass variation a particular sample, wherein the said variation is a result of manufacturing processes.

Differential weighing is often applied in product control process, for which reference product parameters have been specified in order to be used as a source of comparison for the whole series.
Insuchcasestandard deviation is the information which tells about quality and completeness of a final product. For systems based on a feed-back technique such information may be used by control units.
Ambient conditions monitoring

Ambient conditions monitoring

The possibility of cooperation with the THBR 2.0 system
Replaceable unit

Replaceable unit

Replaceable units.
Statistical Quality Control

Statistical Quality Control

Statistical control for determination of basic statistical criteria: maximum, minimum, standard deviation, mean values for each batch, etc.
ALIBI Memory

ALIBI Memory

"ALIBI" memory enables saving and storing up to 100000 measurements.  Measurements are saved automatically upon each pressing of the key. There is no need for any additional operations or changing settings.
The following data related with the measurements is saved: measurement date; measurement time; result (mass); tare value; operator carrying out the measurement (logged in); product name.
The software saves the measurement in a so called loop, i.e. when the measurement no. 100001 is saved, the measurement 1 gets automatically deleted from the memory.
Measurements saved to balance memory cannot be deleted.
You can preview and print out the data saved to the ALIBI database.
Wi-Fi®

Wi-Fi®

Thanks to wireless communication between the computer and a balance, it is possible to use a balance inside a laminar flow hood and a fume cupboard.

Documentation
Datasheet
Data Sheet Data Sheet
Data Sheet

Show me
Show me
Download
Download

Choose more product:
Show me Show me DownloadDownload
User Manuals
User Manual
User Manual
Show me
Show me
Download
Download
(2.36 MB)
User Manual
User Manual
Show me
Show me
Download
Download
(1.24 MB)
Software Manual
Software Manual
Show me
Show me
Download
Download
(1.23 MB)
User Manual
User Manual
Show me
Show me
Download
Download
(13.23 MB)
Start up Guide
Start up Guide
Show me
Show me
Download
Download
(4.76 MB)
Software Manual
Software Manual
Show me
Show me
Download
Download
(0.95 MB)
Conformity Declarations
Show me
Show me
Download
Download
(0.04 MB)
Publications and Brochures
Laboratory balance cleaning
Show me
Show me
Download
Download
(2.52 MB)
RTP Thermal Receipt Printer
Show me
Show me
Download
Download
(1.64 MB)
Lexicon of Basic Metrological Terms
Show me
Show me
Download
Download
(6.31 MB)
RFID
RFID
Show me
Show me
Download
Download
(0.68 MB)
Hybrid Protective Glass
Show me
Show me
Download
Download
(1.86 MB)
Micro Scale Measurement
Show me
Show me
Download
Download
(2.74 MB)
Laboratory Balances
Laboratory Balances
Show me
Show me
Download
Download
(1.68 MB)
Metrology in the laboratory 2024
Show me
Show me
Download
Download
(5.65 MB)
Weighing systems for calibration  and verification of piston pipettes
Weighing systems for calibration and verification of piston pipettes
Show me
Show me
Download
Download
(5.27 MB)
ELLIPSIS 5Y Laboratory Balances
Show me
Show me
Download
Download
(33.90 MB)
Accessories
R-LAB

Accessories

Additional modules

RES Radwag Extended SI Module3
21 CFR Part 11 Compliance Module3

Newsletter

Subscribe to the newsletter if you would like to receive RADWAG news.

View more
Radwag Balances and Scales
Torunska 5
26-600 Radom
Poland
tel.: +48 48 386 60 00
e-mail: export@radwag.com
TIN: PL7960000327
Vimeo Radwag YouTube Radwag Facebook Radwag LinkedIn Radwag
© 2024 RADWAG Balances and Scales. All rights reserved.

Select language

×
Change language AlbanianAlbanian
Change language DanishDanish
Change language NederlandseNederlandse
Change language EstonianEstonian
Change language FinnishFinnish
Change language HungarianHungarian
Change language IcelandicIcelandic
Change language KazakhKazakh
Change language LatvianLatvian
Change language LithuanianLithuanian
Change language MacedonianMacedonian
Change language NorwegianNorwegian
Change language PortuguesePortuguese
Change language RomanianRomanian
Change language RussianRussian
Change language SlovakSlovak
Change language SlovenianSlovenian
Change language SwedishSwedish
Change language UkrainianUkrainian
Change language SerbianSerbian
Change language MontenegrinMontenegrin
Change language page on Deutsch Deutsch
Change language page on Español Español
Change language page on Français Français
Change language page on Italiano Italiano
Change language page on Polski Polski
Change language page on Türkiye Türkiye
Česky
Português (Brasil)
Change website to USA USA
Change language page on 中文 中文
Presentations Presentations Presentations
Subscribe Subscribe Subscribe
Radwag in Facebook Radwag in Facebook Facebook
Radwag in YouTube Radwag in YouTube Youtube
Radwag in Vimeo Radwag in Vimeo Vimeo
Radwag in LinkedIn Radwag in LinkedIn LinkedIn
Webinars Radwag Webinars Radwag Webinars
close
E-mail:
Company name:
Name:
I consent to the processing of my personal data for marketing purposes by Radwag Wagi Elektroniczne Witold Lewandowski.
I consent to receive marketing and product-related messages by electronic means from Radwag Wagi Elektroniczne Witold Lewandowski.
I have read the Privacy Policy of RADWAG Wagi Elektroniczne Witold Lewandowski.
lock_openI want to access the files
close
Slide to go back ↩
close

This site uses files of cookies for statistical, advertising and functional purposes.
By using this website, you consent to our use of cookies in accordance with the principles of our Privacy Policy.

Accept only necessary Accept all