WLY 60.C2.R.PGC Scale

Radwag – Laboratory and Industrial Weighing Solutions
Selected language English
WLY 60.C2.R.PGC Scale
This image is for reference only.

WLY 60.C2.R.PGC Scale

Product code: WK-307-0001
Change the model (9)
done
Max: 60kgd: 10g

 400×500mm
expand_more
Max: 0.6 / 1.2kgd: 0,1 / 0,2g

 195×195mm
Max: 3 / 6kgd: 0,5 / 1g

 195×195mm
Max: 6 / 12kgd: 1 / 2g

 195×195mm
Max: 6 / 12kgd: 1 / 2g

 300×300mm
Max: 6 / 12kgd: 1 / 2g

 300×300mm
Max: 60 / 120kgd: 10 / 20g

 400×500mm
Max: 60kgd: 10g

 400×500mm
Max: 60 / 120kgd: 10 / 20g

 400×500mm
Maximum capacity [Max]: 60 kg
Readability [d]: 10 g

close
Change the model:
WLY 0.6/1.2.D2.PGC Scale
WLY 3/6.D2.PGC Scale
WLY 6/12.D2.PGC Scale
WLY 6/12.F1.K.PGC Scale
WLY 6/12.F1.R.PGC Scale
WLY 60/120.C2.R.PGC Scale
WLY 60.C2.K.PGC Scale
WLY 60.C2.R.PGC Scale
WLY 60/120.C2.K.PGC Scale
Select all
Show me
Download
Add to compare Advanced search
Overview
 

Scale WLY for statistic control
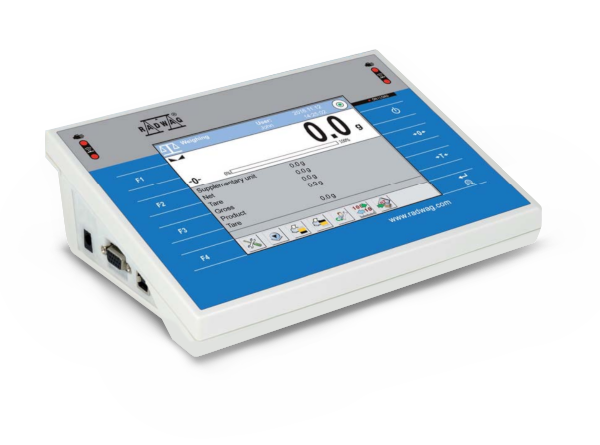
 
Scale WLY is intended to fast and precise determination of mass in laboratory and industrial conditions. The model line is the response for growing market demands concerning simple operation and maximum automation of the weighing process. The scales enables cooperation with barcode scanner, printer, label printer, RFID readers and standard PC devices (mouse, keyboard, USB storage device).


Design and functionality

All WLY scales is equipped with stainless weighing pan, TFT 5,7'' colourful touch screen and membrane keyboard. As an option the scale enables connection of an additional weighing platform to the terminal. The following functions are available:
  • programmable proximity sensors,
  • programmable printout templates,
  • programmable text information for scale's operation,
  • printouts.
Scale WLY/PGC is equipped with modules that put packaged products control into practice. The module is supported by database containing products and operators lists. A control started by the scale is automatically stopped after controlling pre-defined quantity of packages (samples). Number of the packages is fixed by scales program depending on product batch size. Scales are equipped with 5,7" colourful, graphic touch screen display for previewing information concerning currently performed control and its result.

Scale requires two staged verification process. Due to the influence of gravitational acceleration force the scale has to be adjusted on use site.


Control cycle runs according to the following scheme:

  • operator choice,
  • product choice,
  • control start,
  • acquiring weighing records,
  • automatic control end after certain packages number,
  • control report print.
 
Each carried out control is ended with a final report containing all information that is necessary for pre-packaged products control report. The report is automatically saved in scale memory and at the same time it can be printed by printer connected to scale.
 

Scale coupling with computer program enables:
  • keeping weighing records from successive weighments in the database, 
  • automatic printout of control processes from computer software level,
  • sending user defined codes from scale to computer software; the codes match weighed product (product code, operator code, batch quantity, batch no., control Start/Stop),
  • defining product codes and their descriptions (names) from the level of computer program, therefore user can assign an individual product name suitable for the company's branch.


The purpose of the scale is the packaged goods control (PGC), so remember that verification (legalization) is necessary.
We recommend ordering a scale with a proper verification (legalization).


Stainless Steel in RADWAG products
Learn about the use and maintenance of stainless steel products:
Stainless Steel in RADWAG products. Standard and special applications

Check the price in our store

radwaguk.com

Buying from the producer is all about the pros

 
✓ Update as standard

You always get the latest version of the device and software. We are constantly improving our products.

✓ This is priceless

Technical support from the product developers. Who better to know the answers to your questions? Like our Facebook – profile – stay in touch with us.

✓ Smaller carbon footprint

A solidly packaged shipment travels only one way – the one to you.

✓ Long life for your balance

In our permanent offer you will find accessories for our balances and scales, such as cables, weighing pans and power supplies, as well as all spare parts. And we carry out legalization and periodic inspections in our laboratory.

✓ The important thing

You buy a product developed and manufactured in Europe – you get a device with a certain standard of compliance.

Datasheet
Maximum capacity [Max]

60

 kg

Minimum load

0.5

 kg

Readability [d]

10

 g

Verification unit [e]

10

 g

Tare range

-120

 kg

Repeatability

10

 g

Linearity

±10

 g

Stabilization time

3

 s

Adjustment

external


OIML Class

II


Leveling system

manual


Display

5.7” Resistive Color Touchscreen


Weighing pan dimensions

400×500

 mm

Packaging dimensions

720×620×210

 mm

Net weight

12.5

 kg

Gross weight

15

 kg

Protection class

IP 43


Communication interface

2×RS232, 2×USB-A, Ethernet, 4 IN / 4 OUT (digital), Wi-Fi®


Power supply

Adapter: 100 – 240V AC 50/60Hz 1A; 15V DC 2.4A
Balance: 10 – 28V DC 1A max


Operating temperature

+15 – +30

 °C

Storage temperature

-25 – +70

 °C

Relative humidity

10% – 85% RH no condensation


CE
Packaged Goods Control
Videos
Complete Solutions for Mass Measurement in Pharma Industry
Functions
Dosing

Dosing

Weighing process for which reference mass has been determined together with tolerance for its determination. Dosing tolerance is given in [%] and it is calculated in relation to the reference value thus being a permissible deviation of this process. This solution is used for weighing powders, liquids and loose materials. Dosing function performance is often supported with bargraph - load indicator. For industrial scales it is possible to use a control systems of dosing process.
Labelling

Labelling

Marking products with the right symbols contributes to quick and reliable identification. The balance/scale usually transfers product mass or product quantity to the label printer. The transferred value is printed with the following information: bar code, pictogram, content, address etc. In laboratory the labelling is performed in a semi-automatic mode, for industry in an automatic one (dynamic scales).
Plus/Minus Control

Plus/Minus Control

Control of sample's mass carried out with reference to specified MIN and MAX thresholds. The weight is considered to be correct if it is comprised within threshold values. A graphic visualisation of weighing result is displayed in a form of a bar graph.
Percent Weighing

Percent Weighing

Percent Weighing function is used for comparision of measured products with mass standard. Mass of a mass standard may be a numeric value taken from a database or it may be determined through a measurement process. Each measured product is compared to mass standard, mass of which is presumed as a model 100% ideal mass. For products weighing less than the mass standard, obtained results are lower than 100%, for products weighing more, the obtained results are greatly  exceeded.
Totalizing

Totalizing

Function adding new mass value to already obtained one. This allows to determine mass content of the mixture, being a composition of number of different consistence components. Totalizing is limited by maximum capacity parameter.
Parts counting

Parts counting

Function using mass measurement for determination of  measured items quantity. Mass of a single item is required for this process. It may be either estimated through weighment or taken from a database. For items counting the following algorithm is used: all items mass / single item mass = quantity. Function operation is supperted by a mechanism of Automatic Correction of Accuracy. This allows to update single item mass in course of the process. To a certain extend Automatic Correction of Accuracy eliminates error which may be a result of different mass values of seemingly alike single elements. For industry solutions items counting may be simultaneously carried out with checkweighing and dosing thus industry solutions feature audio signalling base informing that specified number of items has been weighed. It is possible to apply weighing systems using few platfroms of different MAX capacities and different accuracies.
Peak hold

Peak hold

Function registering the greatest temporary indication occurring in course of the weighing process. It is most often used in medical scales in order to hold the measurement indication.
Formulation

Formulation

Function supporting the mixture making process, wherein the mixture contains various components. Formulation function usually uses the balance/scale database of components. Formulation serves for monitored checkweighing of every single component with a given tolerance. It is enriched with a set of individual settings.
Statistics

Statistics

Statistiscs function registers and analyses performed measurements. This supplies the user withthe following information: Max and Min standard deviation, average value, variance, range et.
Checkweighing

Checkweighing

Checkweighing function is used for checking whether the measured sample mass is within the predefined threshold values, Low [LO] and Hgh [HI]. The thresholds are given in [g] and [kg] units. Current state of a sample being measured is signalled by means of pictorgams located on a display for laboratory balances, for industrial scales Stackligt System is used. This visual +/- inspection is in operation during segregation, control or packing process of products for which mass has bees determined with a specifaied tolerance, eg. 12860 g 961
IR sensors

IR sensors

Programmable function supporting the weighing process through control of the following options: sliding weighing chamber doors, printout, zeroing, tarring etc. Especially appreciated wherever preventing the balance from soiling is important.
Animal weighing

Animal weighing

Process of mass determination for a product which may unwillingly reposition within the weighing pan. Mass determination in such cases requires much longer period of time when compared to typical weighing process. It is the user who defines period of time needed for control of measured product mass. The user can thus optimize the function depending on the measured product characteristics.
Differential weighing

Differential weighing

Differential weighing informs about mass variation a particular sample, wherein the said variation is a result of manufacturing processes.

Differential weighing is often applied in product control process, for which reference product parameters have been specified in order to be used as a source of comparison for the whole series.
Insuchcasestandard deviation is the information which tells about quality and completeness of a final product. For systems based on a feed-back technique such information may be used by control units.
Packaged Goods Control

Packaged Goods Control

Pre-packaged Goods Control mode enables to collect weighings from RADWAG-designed weighing instruments, carry out control and generate PGC reports. Different types of weighing instruments can be combined into a network. The control can be started on a balance or via computer software. It is automatically finished after a respective quantity of packages is verified.
Collected data allows you to assess quality of produced pre-packaged goods and their conformity with:
- internal quality control system;
- 'Pre-Packaged Goods' regulation of 7th May 2009 (Journal of Laws No 91, item 740), on the requirements concerning quantity inspection of pre-packaged goods control, which inspection is to be carried out by means of random selection of the measurements results and sending those results to pre-packaged goods control procedure.
ALIBI Memory

ALIBI Memory

"ALIBI" memory enables saving and storing up to 100000 measurements.  Measurements are saved automatically upon each pressing of the key. There is no need for any additional operations or changing settings.
The following data related with the measurements is saved: measurement date; measurement time; result (mass); tare value; operator carrying out the measurement (logged in); product name.
The software saves the measurement in a so called loop, i.e. when the measurement no. 100001 is saved, the measurement 1 gets automatically deleted from the memory.
Measurements saved to balance memory cannot be deleted.
You can preview and print out the data saved to the ALIBI database.
Documentation
Datasheet
Data Sheet Data Sheet
Data Sheet

Show me
Show me
Download
Download

Choose more product:
Show me Show me DownloadDownload
User Manuals
Software Manual - CBCP 03
Show me
Show me
Download
Download
(0.23 MB)
User Manual - WLY Multifunctional Scale
Show me
Show me
Download
Download
(1.63 MB)
Quick start
Quick start
Show me
Show me
Download
Download
(2.47 MB)
Software Manual - Appendices 01
Show me
Show me
Download
Download
(1.81 MB)
Start up Guide
Start up Guide
Show me
Show me
Download
Download
(1.92 MB)
Conformity Declarations
Conformity Declaration
Show me
Show me
Download
Download
(0.04 MB)
Publications and Brochures
RTP Thermal Receipt Printer
Show me
Show me
Download
Download
(1.64 MB)
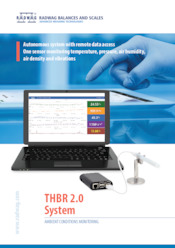
THBR System 2.0
THBR System 2.0
Show me
Show me
Download
Download
(5.17 MB)
Stainless Steel in RADWAG products. Standard and special applications
Show me
Show me
Download
Download
(2.23 MB)
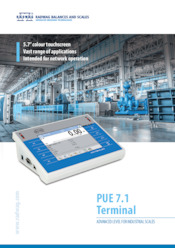
PUE 7.1 Terminal
PUE 7.1 Terminal
Show me
Show me
Download
Download
(2.33 MB)
Accessories
R-LAB

Accessories

Additional modules

Audit Trail3
RES Radwag Extended SI Module3
Workflow - additional module3
RDA (RADWAG Data Access)3

Newsletter

If you wish to receive the latest news about RADWAG products and services, sign up for the newsletter.

More
Radwag Balances and Scales
Torunska 5
26-600 Radom
Poland
tel.: +48 48 386 60 00
e-mail: export@radwag.com
TIN: PL7960000327
Vimeo Radwag YouTube Radwag Facebook Radwag LinkedIn Radwag
© 2024 RADWAG Balances and Scales. All rights reserved.

Select language

×
Change language AlbanianAlbanian
Change language DanishDanish
Change language NederlandseNederlandse
Change language EstonianEstonian
Change language FinnishFinnish
Change language HungarianHungarian
Change language IcelandicIcelandic
Change language KazakhKazakh
Change language LatvianLatvian
Change language LithuanianLithuanian
Change language MacedonianMacedonian
Change language NorwegianNorwegian
Change language PortuguesePortuguese
Change language RomanianRomanian
Change language RussianRussian
Change language SlovakSlovak
Change language SlovenianSlovenian
Change language SwedishSwedish
Change language UkrainianUkrainian
Change language SerbianSerbian
Change language MontenegrinMontenegrin
Change language page on Deutsch Deutsch
Change language page on Español Español
Change language page on Français Français
Change language page on Italiano Italiano
Change language page on Polski Polski
Change language page on Türkiye Türkiye
Česky
Português (Brasil)
Change website to USA USA
Change language page on 中文 中文
Presentations Presentations Presentations
Subscribe Subscribe Subscribe
Radwag in Facebook Radwag in Facebook Facebook
Radwag in YouTube Radwag in YouTube Youtube
Radwag in Vimeo Radwag in Vimeo Vimeo
Radwag in LinkedIn Radwag in LinkedIn LinkedIn
Webinars Radwag Webinars Radwag Webinars
close
E-mail:
Company name:
Name:
I consent to the processing of my personal data for marketing purposes by Radwag Wagi Elektroniczne Witold Lewandowski.
I consent to receive marketing and product-related messages by electronic means from Radwag Wagi Elektroniczne Witold Lewandowski.
I have read the Privacy Policy of RADWAG Wagi Elektroniczne Witold Lewandowski.
lock_openI want to access the files
close
Slide to go back ↩