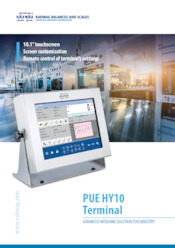
Terminale di pesata PUE HY10

Radwag Bilance e sistemi di pesatura
Selected language Italiano
Terminale di pesata PUE HY10
This image is for reference only.

Terminale di pesata PUE HY10

Codice prodotto: WX-008-0027
close
Modifica del modello:
Terminale di pesata PUE HY10
Select all
Vista
Salva
Caratteristiche generali
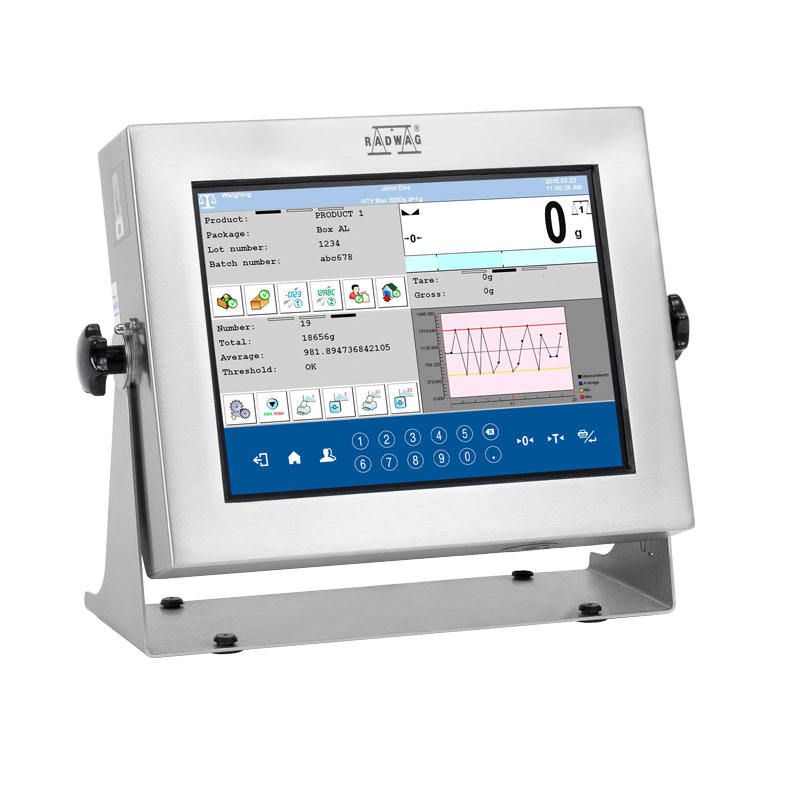
PUE HY10 terminal is a constructional component of load cell scales, dosing devices, formula-making scales and sets designed to perform operations such as labelling and counting.

Construction
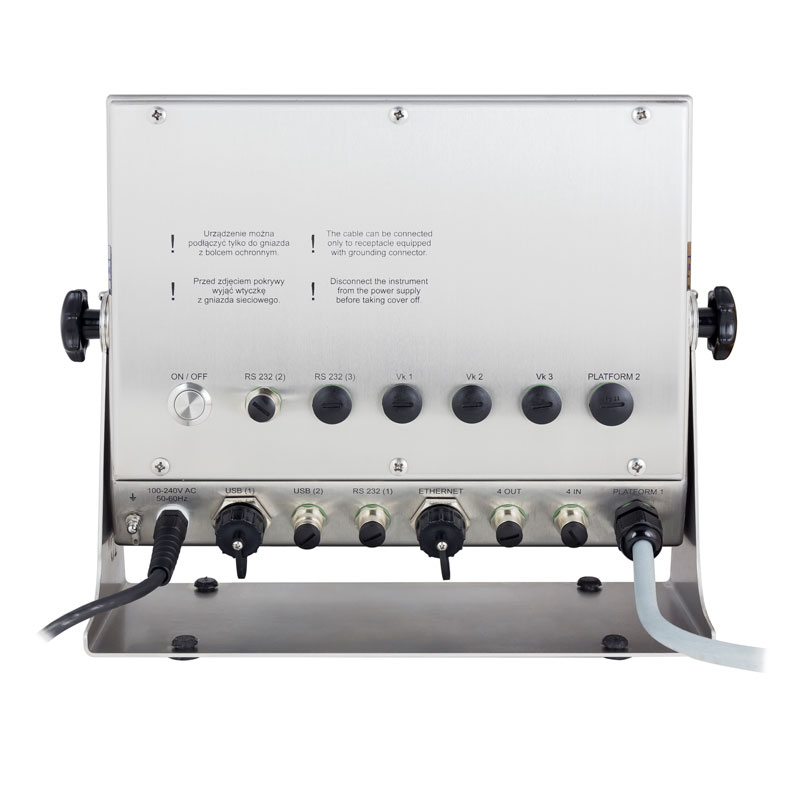
PUE HY10 terminal is housed in a stainless steel casing with IP68/69. The terminal features 10,1” touchscreen display and numerous ports allowing connection of various devices: 2 weighing platforms, barcode scanner, printer, labeller, transponder card reader and PC equipment (mouse, computer, keyboard, USB flash drive).

Area of use:
  • Industrial weighing systems, favouring PUE HY10 application owing to its solid, durable construction and ease of operation.
  • Industrial systems intended for the following operations performance:
               - counting,
               - labelling,
               - dosing,
               - making formulas.
  • Industrial weighing systems operating in cooperation with systems designed for automatic control – cooperation possible due to numerous INs and OUTs.
Stainless Steel in RADWAG products
Learn about the use and maintenance of stainless steel products:
Stainless Steel in RADWAG products. Standard and special applications
Specifiche
Classe OIML

II or III


Quantita massima di unita verificate

6000 e


Minimum volatge per verification unit

0,4 µV


Maximum voltage per verification unit

3,25 µV


Impedenza della cella al carico minimo

50 Ω


Maximum load cell impedance

1200 Ω


Tensione di eccitazione della cella di carico

5V DC


Incremento massimo del segnale

19,5 mV


Connessione di celle di carico

4 or 6 wires + shield


Display

10,1″ graphic colour touchscreen


Device dimensions

357×275×120

 mm

Dimensioni del pacco

420×350×230

 mm

Peso netto

5,7

 kg

Peso lordo

6,5

 kg

Punteggio IP

IP 66 / 67 / 69


Touch panel

capacitive


Tastiera

touch screen


Struttura

Stainless steel


Interfaccia

2×RS232, 2×USB-A, Ethernet, 4 IN / 4 OUT (digital)


Interfacce opzionali

module Wi-Fi® 802.11 b/g/n, module Profibus (DP SLAVE), module RS485, module PROFINET (RJ45), analog output module (4-20mA, 0-20mA, 0-10V) , 12IN / 12OUT (IN – 5-24 VDC, OUT – max 30 VDC, 0,5 ADC)


Ambiente di lavoro

-10 – +40

 °C

Umidità relativa

10% – 85% RH no condensation


Sistema operativo

Linux


Processore

quad-core 64-bit Cortex-A53 1,2 GHz


Memoria

RAM 1GB LPDDR2


Memoria dati

16 GB (micro SD)


Numero massimo di piattaforme

4


CE
Garanzia 2 anni
Video
High Resolution Scales by RADWAG – Extremely Robust & Impressively Accurate
Complete Solutions for Mass Measurement in Pharma Industry
PUE HY10 Weighing Indicator
Funzioni
Dosing

Dosing

Weighing process for which reference mass has been determined together with tolerance for its determination. Dosing tolerance is given in [%] and it is calculated in relation to the reference value thus being a permissible deviation of this process. This solution is used for weighing powders, liquids and loose materials. Dosing function performance is often supported with bargraph - load indicator. For industrial scales it is possible to use a control systems of dosing process.
Labelling

Labelling

Marking products with the right symbols contributes to quick and reliable identification. The balance/scale usually transfers product mass or product quantity to the label printer. The transferred value is printed with the following information: bar code, pictogram, content, address etc. In laboratory the labelling is performed in a semi-automatic mode, for industry in an automatic one (dynamic scales).
Plus/Minus Control

Plus/Minus Control

Control of sample's mass carried out with reference to specified MIN and MAX thresholds. The weight is considered to be correct if it is comprised within threshold values. A graphic visualisation of weighing result is displayed in a form of a bar graph.
Percent Weighing

Percent Weighing

Percent Weighing function is used for comparision of measured products with mass standard. Mass of a mass standard may be a numeric value taken from a database or it may be determined through a measurement process. Each measured product is compared to mass standard, mass of which is presumed as a model 100% ideal mass. For products weighing less than the mass standard, obtained results are lower than 100%, for products weighing more, the obtained results are greatly  exceeded.
Totalizing

Totalizing

Function adding new mass value to already obtained one. This allows to determine mass content of the mixture, being a composition of number of different consistence components. Totalizing is limited by maximum capacity parameter.
Parts counting

Parts counting

Function using mass measurement for determination of  measured items quantity. Mass of a single item is required for this process. It may be either estimated through weighment or taken from a database. For items counting the following algorithm is used: all items mass / single item mass = quantity. Function operation is supperted by a mechanism of Automatic Correction of Accuracy. This allows to update single item mass in course of the process. To a certain extend Automatic Correction of Accuracy eliminates error which may be a result of different mass values of seemingly alike single elements. For industry solutions items counting may be simultaneously carried out with checkweighing and dosing thus industry solutions feature audio signalling base informing that specified number of items has been weighed. It is possible to apply weighing systems using few platfroms of different MAX capacities and different accuracies.
Peak hold

Peak hold

Function registering the greatest temporary indication occurring in course of the weighing process. It is most often used in medical scales in order to hold the measurement indication.
Formulation

Formulation

Function supporting the mixture making process, wherein the mixture contains various components. Formulation function usually uses the balance/scale database of components. Formulation serves for monitored checkweighing of every single component with a given tolerance. It is enriched with a set of individual settings.
Statistics

Statistics

Statistiscs function registers and analyses performed measurements. This supplies the user withthe following information: Max and Min standard deviation, average value, variance, range et.
Checkweighing

Checkweighing

Checkweighing function is used for checking whether the measured sample mass is within the predefined threshold values, Low [LO] and Hgh [HI]. The thresholds are given in [g] and [kg] units. Current state of a sample being measured is signalled by means of pictorgams located on a display for laboratory balances, for industrial scales Stackligt System is used. This visual +/- inspection is in operation during segregation, control or packing process of products for which mass has bees determined with a specifaied tolerance, eg. 12860 g 961
GLP Procedures

GLP Procedures

Diagnostic function allowing to objectively document performed measurements. GLP procedures may be either presented in a short report form or extended one.
Animal weighing

Animal weighing

Process of mass determination for a product which may unwillingly reposition within the weighing pan. Mass determination in such cases requires much longer period of time when compared to typical weighing process. It is the user who defines period of time needed for control of measured product mass. The user can thus optimize the function depending on the measured product characteristics.
Differential weighing

Differential weighing

Differential weighing informs about mass variation a particular sample, wherein the said variation is a result of manufacturing processes.

Differential weighing is often applied in product control process, for which reference product parameters have been specified in order to be used as a source of comparison for the whole series.
Insuchcasestandard deviation is the information which tells about quality and completeness of a final product. For systems based on a feed-back technique such information may be used by control units.
Replaceable unit

Replaceable unit

Replaceable units.
Statistical Quality Control

Statistical Quality Control

Statistical control for determination of basic statistical criteria: maximum, minimum, standard deviation, mean values for each batch, etc.
ALIBI Memory

ALIBI Memory

"ALIBI" memory enables saving and storing up to 100000 measurements.  Measurements are saved automatically upon each pressing of the key. There is no need for any additional operations or changing settings.
The following data related with the measurements is saved: measurement date; measurement time; result (mass); tare value; operator carrying out the measurement (logged in); product name.
The software saves the measurement in a so called loop, i.e. when the measurement no. 100001 is saved, the measurement 1 gets automatically deleted from the memory.
Measurements saved to balance memory cannot be deleted.
You can preview and print out the data saved to the ALIBI database.
Transactions

Transactions

Complex weighing mode for registration of weighings that are part of transactions such as sale, purchase and warehouse transfer. You can create a new transaction using the scale. It is possible to pause the transaction or abort it.  The function supports warehouse management in an enterprise.
Documentazione
Data Sheet Data Sheet
Data Sheet

Vista
Vista
Salva
Salva

Choose more product:
Vista Vista SalvaSalva
Software Manual - CBCP 03
Vista
Vista
Salva
Salva
(0.23 MB)
User Manual - PUE HY10
Vista
Vista
Salva
Salva
(2.19 MB)
Start up Guide
Start up Guide
Vista
Vista
Salva
Salva
(1.38 MB)
User Manual - HY10 multifunctional scales
Vista
Vista
Salva
Salva
(1.88 MB)
 Software Manual - PUE HY10
Software Manual - PUE HY10
Vista
Vista
Salva
Salva
(7.10 MB)
Software Manual - Radwag-Mass -Node-RED
Vista
Vista
Salva
Salva
(0.57 MB)
 Software Manual - PROFIBUS communication protocol of PUE HY10
Software Manual - PROFIBUS communication protocol of PUE HY10
Vista
Vista
Salva
Salva
(0.65 MB)
User Manual - MODBUS Protocol in RADWAG Indicators
Vista
Vista
Salva
Salva
(1.32 MB)
Software Manual - MODBUS communication protocol of PUE 7.1 / PUE HY10
Vista
Vista
Salva
Salva
(0.82 MB)
Software Manual - Appendices 01
Vista
Vista
Salva
Salva
(1.81 MB)
User Manual - Connecting External Platform
Vista
Vista
Salva
Salva
(0.99 MB)
 Software Manual - PROFINET communication protocol of PUE HY10
Software Manual - PROFINET communication protocol of PUE HY10
Vista
Vista
Salva
Salva
(1.82 MB)
Conformity Declaration
Vista
Vista
Salva
Salva
(0.04 MB)
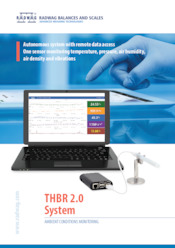
THBR System 2.0
THBR System 2.0
Vista
Vista
Salva
Salva
(5.17 MB)
Stainless Steel in RADWAG products. Standard and special applications
Vista
Vista
Salva
Salva
(2.23 MB)
PUE HY10 - Weighing Terminal
Vista
Vista
Salva
Salva
(2.55 MB)
Terminals and Platforms
Vista
Vista
Salva
Salva
(3.70 MB)
Software
Drivers

Plik GSD Profibus (1.321 KB)

GSD do Profinet (4.574 KB)

Accessori

Newsletter

Subscribe to the newsletter if you would like to receive RADWAG news.

View more
Radwag bilance e sistemi di pesatura
Torunska 5
26-600 Radom
Poland
tel.: +48 48 386 60 00
e-mail: export@radwag.com
TIN: PL7960000327
Vimeo Radwag YouTube Radwag Facebook Radwag LinkedIn Radwag
© 2025 Radwag bilance e sistemi di pesatura. Diritti riservati

selezionare

×
Change language AlbanianAlbanian
Change language DanishDanish
Change language NederlandseNederlandse
Change language EstonianEstonian
Change language FinnishFinnish
Change language HungarianHungarian
Change language IcelandicIcelandic
Change language KazakhKazakh
Change language LatvianLatvian
Change language LithuanianLithuanian
Change language MacedonianMacedonian
Change language NorwegianNorwegian
Change language PortuguesePortuguese
Change language RomanianRomanian
Change language RussianRussian
Change language SlovakSlovak
Change language SlovenianSlovenian
Change language SwedishSwedish
Change language UkrainianUkrainian
Change language SerbianSerbian
Change language MontenegrinMontenegrin
Change language page on Deutsch Deutsch
Change language page on English English
Change language page on Español Español
Change language page on Français Français
Change language page on Polski Polski
Change language page on Türkiye Türkiye
Česky
Português (Brasil)
Change website to USA USA
Change language page on 中文 中文
Presentations Presentations Presentations
Subscribe Subscribe Subscribe
Radwag in Facebook Radwag in Facebook Facebook
Radwag in YouTube Radwag in YouTube Youtube
Radwag in Vimeo Radwag in Vimeo Vimeo
Radwag in LinkedIn Radwag in LinkedIn LinkedIn
Webinars Radwag Webinars Radwag Webinars
close
E-mail
nome azienda:
Nome:
I consent to the processing of my personal data for marketing purposes by Radwag Wagi Elektroniczne Witold Lewandowski.
I consent to receive marketing and product-related messages by electronic means from Radwag Wagi Elektroniczne Witold Lewandowski.
I have read the Privacy Policy of RADWAG Wagi Elektroniczne Witold Lewandowski.
lock_openI want to access the files
close
Slide to go back ↩