C32.30.F1.R Multifunctional Scale
Radwag – Laboratory and Industrial Weighing Solutions
Selected language English
C32.30.F1.R Multifunctional Scale
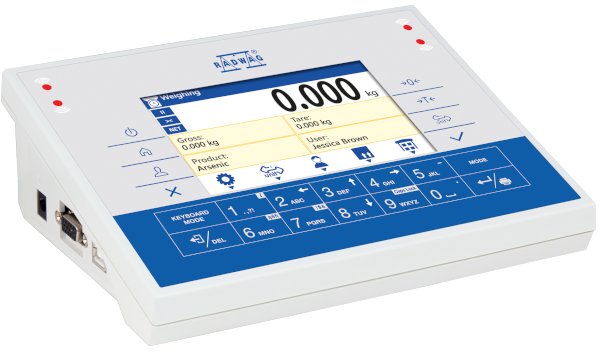
This image is for reference only.

C32.30.F1.R Multifunctional Scale

Product code: WP-120-0016
close
Change the model:
Select all
Show me
Download
Add to compare Advanced search
Overview
 

C32.30.F1.R Multifunctional Scale

 
C32 series is an advanced but at the same time an easy-to-use weighing instrument that can be operated in various industry areas. To ensure precision, speed and excellent measurement repeatability, high quality electronic components are used.


Software

Integrated battery and wireless data transmission enable portable operation. Complex software allows carrying out many tasks connected with mass measurement, e.g. parts counting, checkweighing and statistics.
 
C32 series devices feature user-friendly graphic interface, which can be customized using widgets. This and the large colour display of high resolution assure easy and clear transmission of data on current process. Colour bar graph signals whether
the weighing result is within declared thresholds thus significantly influencing performance. 
 
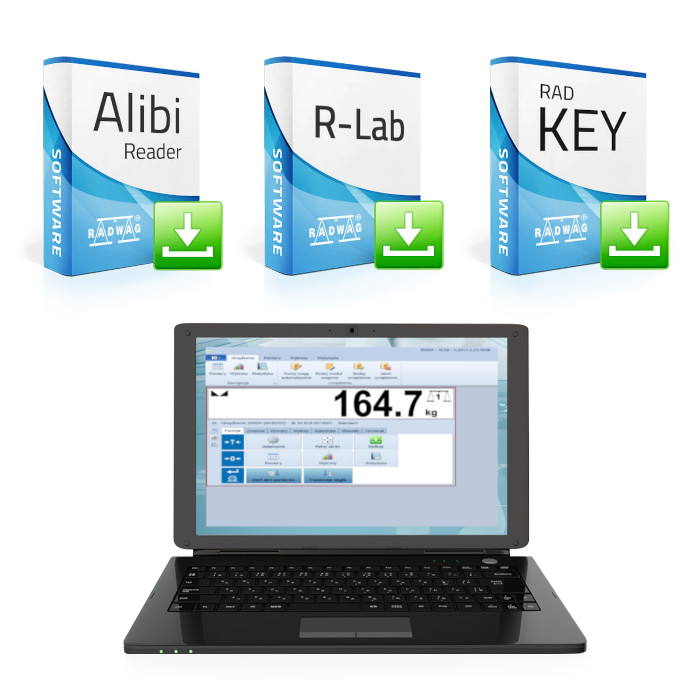
C32 weighing instruments cooperate with RLAB software for collecting, presenting and carrying out statistical analysis of measurements sent by the weighing equipment. The software enables advanced functions for generating and customizing graphs and reports.


Programmable keypad

Complex 22-key keypad features programmable function keys which enable its customization. 
 
Integrated infrared sensors facilitate activation of basic functions without use of a keypad, this will be appreciated by the owners of high precision instruments.


Cooperation

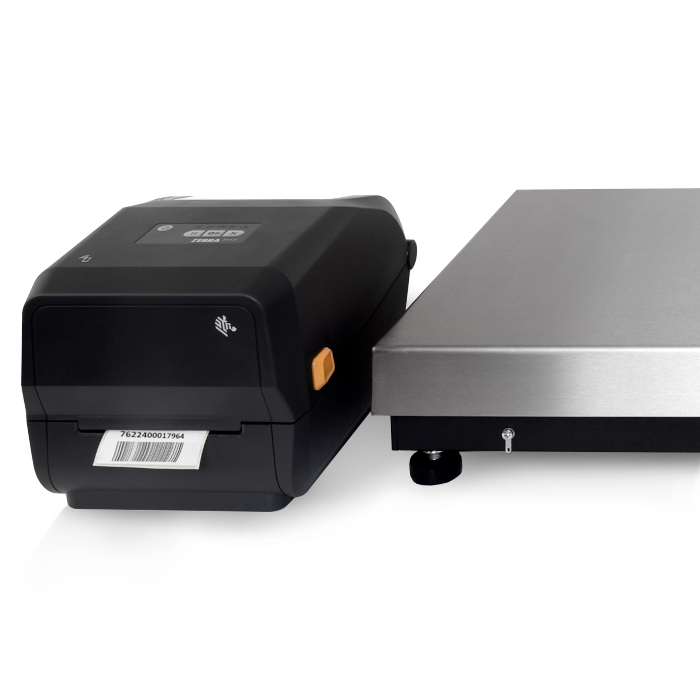
C32 weighing instruments cooperate with barcode scanners and printers, this feature is especially important for those operators who use the instruments for parts counting or any tasks requiring clear-cut identification of measured products.


Communication

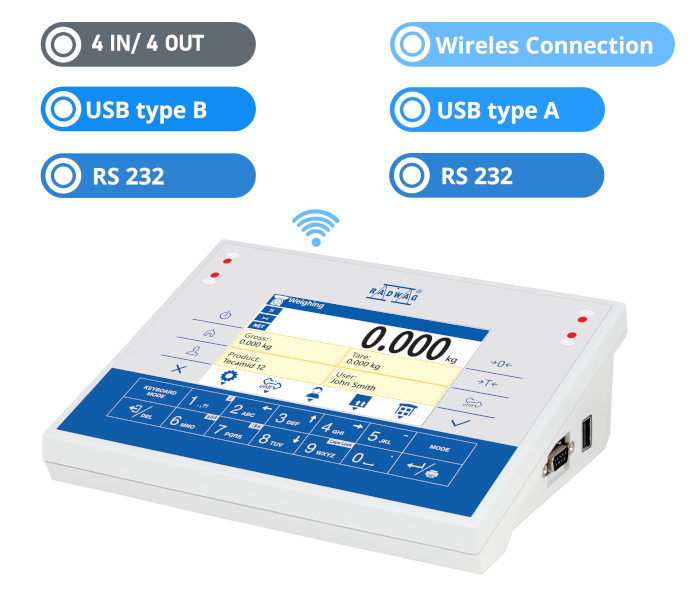
Wide range of communication interfaces ensures easy integration of C32 instruments with external master IT systems and trouble-free data exchange.
 
Integrated inputs/outputs available in the basic version of the weighing instrument enable cooperation with external devices, i.e. control buttons, light signalling towers, buzzers and any other controlling/signalling devices. They also provide the ability to control uncomplicated dosing processes.


Database

Various permissions levels assure safety of stored data and prevent unauthorized operators from modifying the settings.
 
Complex databases of products, packaging and customers are very important for operators working with wide range of products and having an extensive
sales network.
 
Broad range of maximum capacities and readabilities guarantees selecting
the right model for a particular application.


Stainless Steel in RADWAG products
Learn about the use and maintenance of stainless steel products:
Stainless Steel in RADWAG products. Standard and special applications

Check the price in our store

radwaguk.com

Buying from the producer is all about the pros

 
✓ Update as standard

You always get the latest version of the device and software. We are constantly improving our products.

✓ This is priceless

Technical support from the product developers. Who better to know the answers to your questions? Like our Facebook – profile – stay in touch with us.

✓ Smaller carbon footprint

A solidly packaged shipment travels only one way – the one to you.

✓ Long life for your balance

In our permanent offer you will find accessories for our balances and scales, such as cables, weighing pans and power supplies, as well as all spare parts. And we carry out legalization and periodic inspections in our laboratory.

✓ The important thing

You buy a product developed and manufactured in Europe – you get a device with a certain standard of compliance.

Datasheet
Maximum capacity [Max]

30

 kg

Minimum load

200

 g

Readability [d]

10

 g

Tare range

-30

 kg

Max readability for non-verified scale

1

 g

OIML Class

III


Leveling system

manual


Display

5” graphic colour


Weighing pan dimensions

300×300

 mm

Packaging dimensions

570×390×170

 mm

Net weight

5.3

 kg

Gross weight

6.1

 kg

Protection class

IP 65 construction, IP 43 terminal


Construction

mild steel St3S


Weighing pan material

Stainless steel AISI304


Communication interface

2×RS232, USB-A, USB-B, Ethernet, 4 IN / 4 OUT (digital), Wi-Fi®


Power supply

100 – 240 V AC 50/60 Hz


Power consumption max.

10 W


Optional power supply

internal rechargeable battery


Operation time on batteries

operation time up to 5 h


Operating temperature

-10 – +40

 °C

2 years warranty
Verification Additional fee
for verification
CE

* Optional equipment at additional cost

Videos
Complete Solutions for Mass Measurement in Pharma Industry
Functions
Labelling

Labelling

Marking products with the right symbols contributes to quick and reliable identification. The balance/scale usually transfers product mass or product quantity to the label printer. The transferred value is printed with the following information: bar code, pictogram, content, address etc. In laboratory the labelling is performed in a semi-automatic mode, for industry in an automatic one (dynamic scales).
Plus/Minus Control

Plus/Minus Control

Control of sample's mass carried out with reference to specified MIN and MAX thresholds. The weight is considered to be correct if it is comprised within threshold values. A graphic visualisation of weighing result is displayed in a form of a bar graph.
Percent Weighing

Percent Weighing

Percent Weighing function is used for comparision of measured products with mass standard. Mass of a mass standard may be a numeric value taken from a database or it may be determined through a measurement process. Each measured product is compared to mass standard, mass of which is presumed as a model 100% ideal mass. For products weighing less than the mass standard, obtained results are lower than 100%, for products weighing more, the obtained results are greatly  exceeded.
Totalizing

Totalizing

Function adding new mass value to already obtained one. This allows to determine mass content of the mixture, being a composition of number of different consistence components. Totalizing is limited by maximum capacity parameter.
Parts counting

Parts counting

Function using mass measurement for determination of  measured items quantity. Mass of a single item is required for this process. It may be either estimated through weighment or taken from a database. For items counting the following algorithm is used: all items mass / single item mass = quantity. Function operation is supperted by a mechanism of Automatic Correction of Accuracy. This allows to update single item mass in course of the process. To a certain extend Automatic Correction of Accuracy eliminates error which may be a result of different mass values of seemingly alike single elements. For industry solutions items counting may be simultaneously carried out with checkweighing and dosing thus industry solutions feature audio signalling base informing that specified number of items has been weighed. It is possible to apply weighing systems using few platfroms of different MAX capacities and different accuracies.
Statistics

Statistics

Statistiscs function registers and analyses performed measurements. This supplies the user withthe following information: Max and Min standard deviation, average value, variance, range et.
IR sensors

IR sensors

Programmable function supporting the weighing process through control of the following options: sliding weighing chamber doors, printout, zeroing, tarring etc. Especially appreciated wherever preventing the balance from soiling is important.
GLP Procedures

GLP Procedures

Diagnostic function allowing to objectively document performed measurements. GLP procedures may be either presented in a short report form or extended one.
Replaceable unit

Replaceable unit

Replaceable units.
ALIBI Memory

ALIBI Memory

"ALIBI" memory enables saving and storing up to 100000 measurements.  Measurements are saved automatically upon each pressing of the key. There is no need for any additional operations or changing settings.
The following data related with the measurements is saved: measurement date; measurement time; result (mass); tare value; operator carrying out the measurement (logged in); product name.
The software saves the measurement in a so called loop, i.e. when the measurement no. 100001 is saved, the measurement 1 gets automatically deleted from the memory.
Measurements saved to balance memory cannot be deleted.
You can preview and print out the data saved to the ALIBI database.
Documentation
Datasheet
Data Sheet Data Sheet
Data Sheet

Show me
Show me
Download
Download

Choose more product:
Show me Show me DownloadDownload
User Manuals
Software Manual - CBCP 02
Show me
Show me
Download
Download
(1.18 MB)
Software Manual
Software Manual
Show me
Show me
Download
Download
(3.45 MB)
Software Manual - Appendices 02
Show me
Show me
Download
Download
(0.99 MB)
Start up Guide
Start up Guide
Show me
Show me
Download
Download
(3.15 MB)
User Manual- C32
User Manual- C32
Show me
Show me
Download
Download
(2.25 MB)
Quick start
Quick start
Show me
Show me
Download
Download
(2.47 MB)
Software Manual
Software Manual
Show me
Show me
Download
Download
(0.93 MB)
Conformity Declarations
Show me
Show me
Download
Download
(0.04 MB)
Publications and Brochures
RTP Thermal Receipt Printer
Show me
Show me
Download
Download
(1.64 MB)
Stainless Steel in RADWAG products. Standard and special applications
Show me
Show me
Download
Download
(2.23 MB)
Accessories
R-LAB

Accessories

Additional modules

RES Radwag Extended SI Module3

Newsletter

Subscribe to the newsletter if you would like to receive RADWAG news.

View more
Radwag Balances and Scales
Torunska 5
26-600 Radom
Poland
tel.: +48 48 386 60 00
e-mail: export@radwag.com
TIN: PL7960000327
Vimeo Radwag YouTube Radwag Facebook Radwag LinkedIn Radwag
© 2025 RADWAG Balances and Scales. All rights reserved.

Select language

×
Change language AlbanianAlbanian
Change language DanishDanish
Change language NederlandseNederlandse
Change language EstonianEstonian
Change language FinnishFinnish
Change language HungarianHungarian
Change language IcelandicIcelandic
Change language KazakhKazakh
Change language LatvianLatvian
Change language LithuanianLithuanian
Change language MacedonianMacedonian
Change language NorwegianNorwegian
Change language PortuguesePortuguese
Change language RomanianRomanian
Change language RussianRussian
Change language SlovakSlovak
Change language SlovenianSlovenian
Change language SwedishSwedish
Change language UkrainianUkrainian
Change language SerbianSerbian
Change language MontenegrinMontenegrin
Change language page on Deutsch Deutsch
Change language page on Español Español
Change language page on Français Français
Change language page on Italiano Italiano
Change language page on Japanese (日本語) Japanese (日本語)
Change language page on Polski Polski
Change language page on Türkiye Türkiye
Česky
Português (Brasil)
Change website to USA USA
Change language page on 中文 中文
Presentations Presentations Presentations
Subscribe Subscribe Subscribe
Radwag in Facebook Radwag in Facebook Facebook
Radwag in YouTube Radwag in YouTube Youtube
Radwag in Vimeo Radwag in Vimeo Vimeo
Radwag in LinkedIn Radwag in LinkedIn LinkedIn
Webinars Radwag Webinars Radwag Webinars
close
E-mail:
Company name:
Name:
I consent to the processing of my personal data for marketing purposes by Radwag Wagi Elektroniczne Witold Lewandowski.
I consent to receive marketing and product-related messages by electronic means from Radwag Wagi Elektroniczne Witold Lewandowski.
I have read the Privacy Policy of RADWAG Wagi Elektroniczne Witold Lewandowski.
lock_openI want to access the files
close
Slide to go back ↩
close