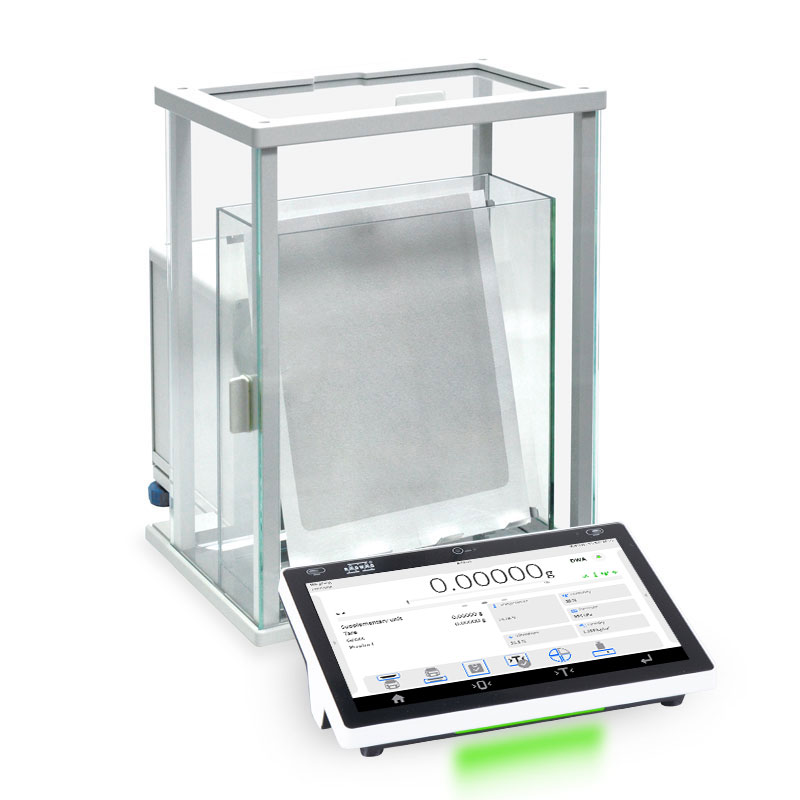
XA 52.5Y.F Analytical Balance

Selected language
Obraz
This image is for reference only.

XA 52.5Y.F Analytical Balance

Product code: WL-110-0017
Change the model (2)
done
Max: 52gd: 0,01mg

 210×254 mm for filters + ø90 mm open-work pan + ø85 mm standard pan (option)
expand_more
Max: 110gd: 0,01mg

 210×254 mm for filters + ø90 mm open-work pan + ø85 mm standard pan (option)
Maximum capacity [Max]: 52 g
Readability [d]: 0,01 mg

close
Change the model:
XA 52.5Y.F Analytical Balance
XA 110.5Y.F Analytical Balance
Select all
View
Download
Add to compare Advanced Search
Overview

XA 52.5Y.F Analytical Balance for Filters

 
XA 5Y.F Analytical Balances are used in quality control processes, where accurate weighing of filters is used to assess filtration efficiency or to calculate the mass of particles retained by the filter. This task is made possible by a weighing pan for filters with which these balances are equipped in addition to the regular one.


Semi-automatic Leveling System

The devices also have a manually opened weighing chamber and use a semi-automatic levelling system. Semi-automatic levelling, the so-called LevelSENSING System, has a great advantage over the manual levelling, in the case of the former one the user is prompted in which direction to level the balance. This shortens the very process.


Do you need a balance that not only determines weight with impressive accuracy, but also performs a digital audit, responds to your voice commands and sends you light messages?
 
 
If so, learn about the functionality of the ELLIPSIS series of balances:


Digital Weighing Auditor

Ensures that your balance is ready for use. It enables air buoyancy compensation in real-time. What is more, it informs about the need for a balance inspection or a periodic audit of the balance’s accuracy and sensitivity.


10-Inch Display

Bigger screen – 10’’ – means more information in one place. On the new ELLIPSIS terminal, you will see up to 3 screens, widgets, graphs, statuses, notes, handy measurement history.


Uncompromising User Verification

For the first time ever, the balance will verify the user using a password, RFID card, fingerprint reader, facial recognition mechanism, or any combination of these.


Ambient Light – one look and everything is clear

The color of the backlight will tell you about status, process results, procedures or alerts. Advanced methods of communication of the balance with the user provide efficiency, transparency and convenience in daily work.


Hotspot

Use the balance on any device connected to it. This can be a smartphone, tablet, or computer.


RFID

ELLIPSIS works with RFID tags* that can be used to tag your products or formulation ingredients in the database. They can also be used to identify a user.


Live Note – Note Down Your Conclusions

It’s the first time you can add a voice memo to a measurement series or procedure report. If you prefer to write it down, ELLIPSIS allows you to add a text note.


Handy Library

This is where a series of recent measurements or a report ready for digital signature, according to 21 CFR Part 11, can be found.


Widgets

Prepared to display what you need most at any given moment.


Smart Min Weight

The balance displays whether the value of the weight you want to weigh is below or above the minimum weight threshold.


21 CFR Part 11

Do you work in the pharmaceutical industry? Do you need a digital signature?
 
We are offering the laboratory balance which as a standalone fully meets the requirements of 21 CFR Part 11/ EU GMP Annex 11.
 
 Full data security
 Electronic signatures
 Validations
 Electronic records
 Audit trails


Modbus TCP/IP

is one of the most popular communication protocols in industrial automation. Implementing it in the 5Y balances and CY10 scales makes the devices of this series friendly to automation integrators. 
 
A balance or scale in a Modbus system is a slave device and performs tasks specified by the master device which is most often a PLC. Protocol Modbus TCP/IP in the 5Y balances and C10 scales enables, among other things, the realization of mass readout, zeroing and tare functions of the device, as well as tare settings and MIN and MAX thresholds.


Two-point adjustment

Adjacency, which takes place at two measurement points instead of one, improves measurement precision over the full weighing range. And what does this mean for you? More accurate measurement.
 
 
Under-pan weighing
Weighing instruments purchased after 15th February 2023 will allow under-pan weighing at any time after the purchase. All you need to do is just to order a dedicated hook.


* RFID ISO/IEC 14443 Type A, 13.56 MHz
 
 
Stainless Steel in RADWAG products
Learn about the use and maintenance of stainless steel products:
Stainless Steel in RADWAG products. Standard and special applications
Datasheet
Maximum capacity [Max]

52

 g

Minimum load

1

 mg

Readability [d]

0,01

 mg

Verification unit [e]

1

 mg

Tare range

-52

 mg

Standard repeatability [5% Max]

0,007

 mg

Standard repeatability [Max]

0,01

 mg

Standard minimum weight (USP)

14

 mg

Standard minimum weight (U=1%, k=2)

1,4

 mg

Permissible repeatability [5% Max]

0,01

 mg

Permissible repeatability [Max]

0,02

 mg

Linearity

±0,03

 mg

Eccentric load deviation

0,03

 mg

Sensitivity time drift

1×10⁻⁶/Year×Rt


Stabilization time

5 s (30 s for filters)


Adjustment

internal (automatic)


OIML Class

I


Leveling system

semi-automatic – LevelSENSING


Display

10″ graphic colour touchscreen


Weighing chamber doors

manual


Delivery components

Analytical Balance, weighing pan, weighing pan for filters, weighing pan shield, centring ring, bottom cover, brush, fabric dust cover, power supply.


Weighing pan dimensions

210×254 mm for filters + ø90 mm open-work pan + ø85 mm standard pan (option)


Packaging dimensions

865×510×690

 mm

Net weight

12,7

 kg

Gross weight

23,5

 kg

Protection class

IP 43


Communication interface

2×USB-A, USB-C, HDMI, Ethernet, Wi-Fi®, Hotspot


Power supply

Adapter: 100 – 240V AC 50/60Hz 1A; 15V DC 2,4A
Balance: 12 – 15V DC 1,1A max


Operating temperature

+10 – +50

 °C

CE
Verification Additional fee
for verification
5 years warranty

Repeatability is expressed as a standard deviation from 10 weighing cycles.
Stabilization time depends on the ambient conditions and the dynamics of weighing pan loading; specified for FAST profile.

360°
Videos
Precision and Working Comfort – Operating RADWAG Balances in Every Glove!
5Y Functions: Animal Weighing
5Y Functions: Statistics
5Y Functions: DWA®
5Y Balance and Barcode Scanner – Easy Connection
New Menu Language in 5Y Series Balances: Japanese
5Y Functions: Checkweighing
5Y Functions: Dosing
5Y Functions: Formulations
Percentage deviations
5Y Functions: Weighing
5Y Functions: Parts counting
5Y Functions: Proximity Sensors – Touch-Free Control (Tutorial)
5Y Functions: GLP Procedures – Objective Documentation of Measurements (Tutorial)
Weighing Printout Design in Analytical and Precision Balances (Tutorial)
Easy Printing with Wi-Fi® Thermal Receipt Printer by RADWAG.
ELLIPSIS – New Balance by RADWAG
ELLIPSIS – Cutting Edge, Innovative, New
Talk to it. Voice Commands in New ELLIPSIS Balance by RADWAG
310 ELLIPSIS – Scan or Tap to Log In
Remote VPN Support on ELLIPSIS Balances
ELLIPSIS – Unlimited Connections
Connecting RADWAG RTP-UEW80 Printer via Wi-Fi® (Tutorial)
XA 5Y.M Unpacking and Installation (Tutorial)
RTP - The First Receipt Printer of RADWAG Production!
Complete Solutions for Mass Measurement in Pharma Industry
New AS and PS 5Y Balances – Autotest (Tutorial)
4y series - Ultra-microbalances and microbalances
RADWAG Remote Desktop
RADWAG Remote Desktop - Windows 10
4Y Balances: Video-Guidance and an on-screen manuals
Functions
Autotest

Autotest

Diagnostic function aiming at metrological parameters determination (repeatability), the parameters are determined for the actual conditions of use. When speaking of repeatability it may be also used for weighing time optimization. Autotest is operated in an automatic mode thus operator’s time is saved.
Dosing

Dosing

Weighing process for which reference mass has been determined together with tolerance for its determination. Dosing tolerance is given in [%] and it is calculated in relation to the reference value thus being a permissible deviation of this process. This solution is used for weighing powders, liquids and loose materials. Dosing function performance is often supported with bargraph - load indicator. For industrial scales it is possible to use a control systems of dosing process.
Percent Weighing

Percent Weighing

Percent Weighing function is used for comparision of measured products with mass standard. Mass of a mass standard may be a numeric value taken from a database or it may be determined through a measurement process. Each measured product is compared to mass standard, mass of which is presumed as a model 100% ideal mass. For products weighing less than the mass standard, obtained results are lower than 100%, for products weighing more, the obtained results are greatly  exceeded.
Parts counting

Parts counting

Function using mass measurement for determination of  measured items quantity. Mass of a single item is required for this process. It may be either estimated through weighment or taken from a database. For items counting the following algorithm is used: all items mass / single item mass = quantity. Function operation is supperted by a mechanism of Automatic Correction of Accuracy. This allows to update single item mass in course of the process. To a certain extend Automatic Correction of Accuracy eliminates error which may be a result of different mass values of seemingly alike single elements. For industry solutions items counting may be simultaneously carried out with checkweighing and dosing thus industry solutions feature audio signalling base informing that specified number of items has been weighed. It is possible to apply weighing systems using few platfroms of different MAX capacities and different accuracies.
Formulation

Formulation

Function supporting the mixture making process, wherein the mixture contains various components. Formulation function usually uses the balance/scale database of components. Formulation serves for monitored checkweighing of every single component with a given tolerance. It is enriched with a set of individual settings.
Statistics

Statistics

Statistiscs function registers and analyses performed measurements. This supplies the user withthe following information: Max and Min standard deviation, average value, variance, range et.
Checkweighing

Checkweighing

Checkweighing function is used for checking whether the measured sample mass is within the predefined threshold values, Low [LO] and Hgh [HI]. The thresholds are given in [g] and [kg] units. Current state of a sample being measured is signalled by means of pictorgams located on a display for laboratory balances, for industrial scales Stackligt System is used. This visual +/- inspection is in operation during segregation, control or packing process of products for which mass has bees determined with a specifaied tolerance, eg. 12860 g 961
IR sensors

IR sensors

Programmable function supporting the weighing process through control of the following options: sliding weighing chamber doors, printout, zeroing, tarring etc. Especially appreciated wherever preventing the balance from soiling is important.
Under-pan weighing

Under-pan weighing

The solution enables weighing with use of a stand, which is advisable for loads of non-standard shapes and dimensions and those that generate magnetic field.
GLP Procedures

GLP Procedures

Diagnostic function allowing to objectively document performed measurements. GLP procedures may be either presented in a short report form or extended one.
Animal weighing

Animal weighing

Process of mass determination for a product which may unwillingly reposition within the weighing pan. Mass determination in such cases requires much longer period of time when compared to typical weighing process. It is the user who defines period of time needed for control of measured product mass. The user can thus optimize the function depending on the measured product characteristics.
Air density correction

Air density correction

Function performing correction of mass measurement indication, wherein the air density is taken into account. It is used in balances with reading unit < 0,01 mg.
Differential weighing

Differential weighing

Differential weighing informs about mass variation a particular sample, wherein the said variation is a result of manufacturing processes.

Differential weighing is often applied in product control process, for which reference product parameters have been specified in order to be used as a source of comparison for the whole series.
Insuchcasestandard deviation is the information which tells about quality and completeness of a final product. For systems based on a feed-back technique such information may be used by control units.
Ambient conditions monitoring

Ambient conditions monitoring

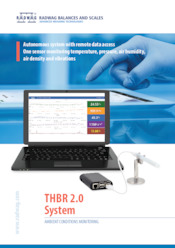
The possibility of cooperation with the THBR 2.0 system
Replaceable unit

Replaceable unit

Replaceable units.
Statistical Quality Control

Statistical Quality Control

Statistical control for determination of basic statistical criteria: maximum, minimum, standard deviation, mean values for each batch, etc.
ALIBI Memory

ALIBI Memory

"ALIBI" memory enables saving and storing up to 100000 measurements.  Measurements are saved automatically upon each pressing of the key. There is no need for any additional operations or changing settings.
The following data related with the measurements is saved: measurement date; measurement time; result (mass); tare value; operator carrying out the measurement (logged in); product name.
The software saves the measurement in a so called loop, i.e. when the measurement no. 100001 is saved, the measurement 1 gets automatically deleted from the memory.
Measurements saved to balance memory cannot be deleted.
You can preview and print out the data saved to the ALIBI database.
Wi-Fi®

Wi-Fi®

Thanks to wireless communication between the computer and a balance, it is possible to use a balance inside a laminar flow hood and a fume cupboard.

Documentation
Data Sheet Data Sheet
Data Sheet

View
View
Download
Download

Choose more product:
View View DownloadDownload
User Manual
User Manual
View
View
Download
Download
(2.36 MB)
User Manual
User Manual
View
View
Download
Download
(1.24 MB)
Software Manual
Software Manual
View
View
Download
Download
(1.23 MB)
User Manual
User Manual
View
View
Download
Download
(13.23 MB)
Software Manual - Radwag-Mass -Node-RED
View
View
Download
Download
(0.57 MB)
Start up Guide
Start up Guide
View
View
Download
Download
(4.76 MB)
Software Manual
Software Manual
View
View
Download
Download
(0.95 MB)
Conformity Declarations
View
View
Download
Download
(0.04 MB)
Principles of Metrology
View
View
Download
Download
(0.10 MB)
Laboratory balance cleaning
View
View
Download
Download
(2.52 MB)
RTP Thermal Receipt Printer
View
View
Download
Download
(1.64 MB)
Detection of vibrations at the electronic balances workstation
View
View
Download
Download
(2.02 MB)
THBR System 2.0
THBR System 2.0
View
View
Download
Download
(5.17 MB)
Lexicon of Basic Metrological Terms
View
View
Download
Download
(6.31 MB)
RFID
RFID
View
View
Download
Download
(0.68 MB)
Hybrid Protective Glass
View
View
Download
Download
(1.86 MB)
Micro Scale Measurement
View
View
Download
Download
(2.74 MB)
Laboratory Balances
Laboratory Balances
View
View
Download
Download
(1.68 MB)
Stainless Steel in RADWAG products. Standard and special applications
View
View
Download
Download
(2.23 MB)
Metrology in the laboratory 2024
View
View
Download
Download
(5.65 MB)
SQC in laboratory
SQC in laboratory
View
View
Download
Download
(2.31 MB)
Defined Weighing Profiles
View
View
Download
Download
(1.36 MB)
ELLIPSIS 5Y Laboratory Balances
View
View
Download
Download
(33.90 MB)
Gravimetric Methods
Gravimetric Methods
View
View
Download
Download
(7.37 MB)
Accessories
RFID Tags

Accessories

Newsletter

Subscribe to the newsletter if you would like to receive RADWAG news.

View more
Radwag Balances and Scales
Torunska 5
26-600 Radom
Poland
tel.: +48 48 386 60 00
e-mail: export@radwag.com
TIN: PL7960000327
Vimeo Radwag YouTube Radwag Facebook Radwag LinkedIn Radwag
© 2024 RADWAG Balances and Scales. All rights reserved.

Select language

×
Change language AlbanianAlbanian
Change language DanishDanish
Change language NederlandseNederlandse
Change language EstonianEstonian
Change language FinnishFinnish
Change language HungarianHungarian
Change language IcelandicIcelandic
Change language KazakhKazakh
Change language LatvianLatvian
Change language LithuanianLithuanian
Change language MacedonianMacedonian
Change language NorwegianNorwegian
Change language PortuguesePortuguese
Change language RomanianRomanian
Change language RussianRussian
Change language SlovakSlovak
Change language SlovenianSlovenian
Change language SwedishSwedish
Change language UkrainianUkrainian
Change language SerbianSerbian
Change language MontenegrinMontenegrin
Change language page on Deutsch Deutsch
Change language page on English English
Change language page on Español Español
Change language page on Français Français
Change language page on Italiano Italiano
Change language page on Polski Polski
Change language page on Türkiye Türkiye
Česky
Português (Brasil)
Change website to USA USA
Change language page on 中文 中文
Presentations Presentations Presentations
Subscribe Subscribe Subscribe
Radwag in Facebook Radwag in Facebook Facebook
Radwag in YouTube Radwag in YouTube Youtube
Radwag in Vimeo Radwag in Vimeo Vimeo
Radwag in LinkedIn Radwag in LinkedIn LinkedIn
Webinars Radwag Webinars Radwag Webinars
close
E-mail:
Company name:
Name:
I consent to the processing of my personal data for marketing purposes by Radwag Wagi Elektroniczne Witold Lewandowski.
I consent to receive marketing and product-related messages by electronic means from Radwag Wagi Elektroniczne Witold Lewandowski.
I have read the Privacy Policy of RADWAG Wagi Elektroniczne Witold Lewandowski.
lock_openI want to access the files
close
Slide to go back ↩