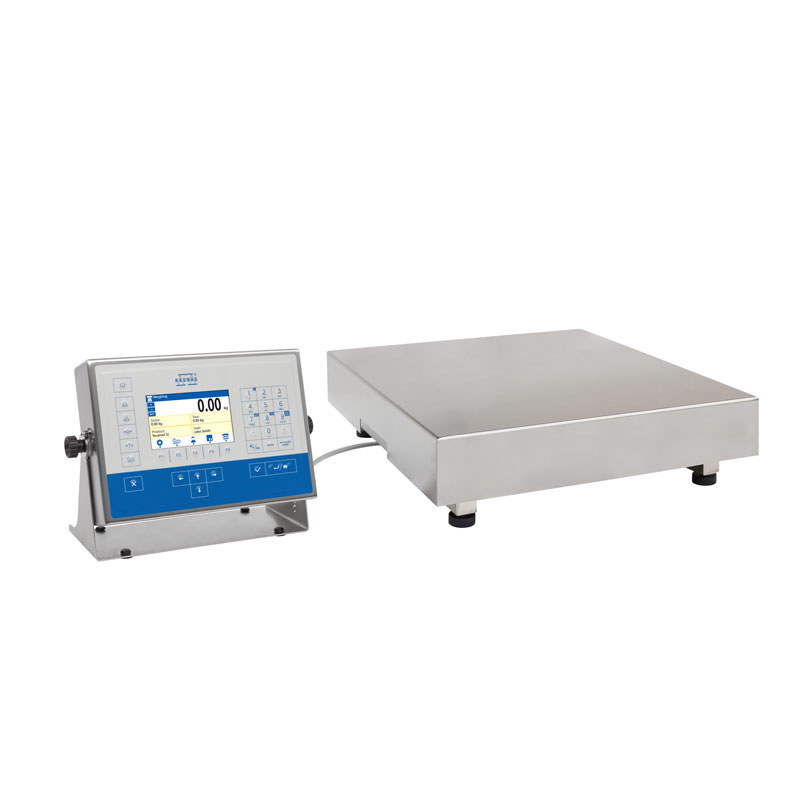
HX5.EX-1.15.H3/5 One Load Cell Platform Scale

Selected language
HX5.EX-1.15.H3/5 One Load Cell Platform Scale
This image is for reference only.

HX5.EX-1.15.H3/5 One Load Cell Platform Scale

Product code: WW-006-0034
Change the model (28)
done
Max: 15kgd: 5g

 400×600mm
expand_more
Max: 1,5kgd: 0,5g

 150×200mm
Max: 3kgd: 1g

 150×200mm
Max: 3kgd: 1g

 250×300mm
Max: 6kgd: 2g

 410×410mm
Max: 6kgd: 2g

 150×200mm
Max: 6kgd: 2g

 250×300mm
Max: 15kgd: 5g

 600×600mm
Max: 15kgd: 5g

 150×200mm
Max: 15kgd: 5g

 250×300mm
Max: 15kgd: 5g

 410×410mm
Max: 15kgd: 5g

 500×500mm
Max: 30kgd: 10g

 250×300mm
Max: 30kgd: 10g

 410×410mm
Max: 30kgd: 10g

 400×600mm
Max: 30kgd: 10g

 500×500mm
Max: 30kgd: 10g

 600×600mm
Max: 60kgd: 20g

 410×410mm
Max: 60kgd: 20g

 400×600mm
Max: 60kgd: 20g

 500×500mm
Max: 60kgd: 20g

 600×600mm
Max: 60kgd: 20g

 800×800mm
Max: 150kgd: 50g

 410×410mm
Max: 150kgd: 40g

 400×600mm
Max: 150kgd: 50g

 500×500mm
Max: 150kgd: 50g

 600×600mm
Max: 150kgd: 50g

 800×800mm
Max: 300kgd: 100g

 800×800mm
Maximum capacity [Max]: 15 kg
Readability [d]: 5 g

close
Change the model:
HX5.EX-1.1,5.H1 One Load Cell Platform Scale
HX5.EX-1.3.H1 One Load Cell Platform Scale
HX5.EX-1.3.H2 One Load Cell Platform Scale
HX5.EX-1.6.H3 One Load Cell Platform Scale
HX5.EX-1.6.H1 One Load Cell Platform Scale
HX5.EX-1.6.H2 One Load Cell Platform Scale
HX5.EX-1.15.H5 One Load Cell Platform Scale
HX5.EX-1.15.H1 One Load Cell Platform Scale
HX5.EX-1.15.H2 One Load Cell Platform Scale
HX5.EX-1.15.H3 One Load Cell Platform Scale
HX5.EX-1.15.H3/5 One Load Cell Platform Scale
HX5.EX-1.15.H4 One Load Cell Platform Scale
HX5.EX-1.30.H2 One Load Cell Platform Scale
HX5.EX-1.30.H3 One Load Cell Platform Scale
HX5.EX-1.30.H3/5 One Load Cell Platform Scale
HX5.EX-1.30.H4 One Load Cell Platform Scale
HX5.EX-1.30.H5 One Load Cell Platform Scale
HX5.EX-1.60.H3 One Load Cell Platform Scale
HX5.EX-1.60.H3/5 One Load Cell Platform Scale
HX5.EX-1.60.H4 One Load Cell Platform Scale
HX5.EX-1.60.H5 One Load Cell Platform Scale
HX5.EX-1.60.H6 One Load Cell Platform Scale
HX5.EX-1.150.H3 One Load Cell Platform Scale
HX5.EX-1.150.H3/5 One Load Cell Platform Scale
HX5.EX-1.150.H4 One Load Cell Platform Scale
HX5.EX-1.150.H5 One Load Cell Platform Scale
HX5.EX-1.150.H6 One Load Cell Platform Scale
HX5.EX-1.300.H6 One Load Cell Platform Scale
Select all
View
Download
Add to compare Advanced Search
Overview
The HX5.EX scale is a modern weighing instrument assuring fast and reliable measurement in hazardous areas classified as zones 1/21 and 2/22. To ensure precision and excellent measurement repeatability, high quality electronic components are used.
The weighing platforms offered in wide range of dimensions and maximum capacities, this combined with excellent metrological parameters enables easy selection of an instrument that meets the most demanding requirements.
Standard version of the scale is equipped with 2 serial, intrinsically safe RS232 communication interfaces, and with one RS485 interface. They facilitate cooperation with equipment intended for operation in hazardous areas. Possibility to add digital inputs/outputs extends the range of instruments compatible with the indicator by automatic elements compliant with ATEX directive.
More demanding customers can use the IM01.EX module, installed in the safe area, which extends the available connectors by Ethernet, USB, 4-20mA/0- 10V analog outputs, Profibus DP and additional digital inputs/outputs. This enables cooperation with external devices: barcode scanners, printers, external displays, control buttons, light signalling towers, other controlling/signalling devices, systems for automatic process control and superior IT systems.
 
Scale operation requires use of a dedicated PM01.EX power supply, which is not a standard scale component. 
To operate the scale, order a selected type of the dedicated intrinsically safe power supply.
Power supply types:
  • PM01.EX-1 - power supply  for operation in ATEX area. Used when it is required to connect the power supply to voltage source placed in hazardous area.
  • PM01.EX-2 - power supply  for operation outside ATEX area. Used when power supply connection to voltage source is carried out outside hazardous area.
Complex software enables carrying out many tasks connected with mass measurement, e.g. parts counting, checkweighing and statistics.
The scales feature user-friendly graphic interface, which can be customized using widgets. This and the large colour display of high resolution guarantee easy and clear transmission of data on current process.
Colour bar graph significantly influences performance by signalling whether the weighing result is within declared thresholds or not. 
Datasheet
Maximum capacity [Max]

15

 kg

Minimum load

100

 g

Readability [d]

5

 g

Tare range

-15

 kg

OIML Class

III


Display

5” graphic colour


Cable length

2,5

 m

Weighing pan dimensions

400×600

 mm

Packaging dimensions

490×680×450

 mm

Protection class

IP 68 construction, IP 66 / 68 terminal


Construction

Stainless steel AISI304


Weighing pan material

Stainless steel AISI304


ATEX Certification

II 2G Ex ib IIB T4 Gb


IECEx Certification

Ex ib IIB T4 Gb


Indicator

PUE HX5.EX-1


Communication interface

2×RS232, RS485


Power supply

100 – 240 V AC 50/60 Hz


Power consumption max.

15 W


Operating temperature

-10 – +40

 °C

Relative humidity

10% – 85% RH no condensation


CE
Verification Extra payment
for verification
2 years warranty
Scales with ATEX certificate
Scales with IECEx certificate
Functions
Labelling

Labelling

Marking products with the right symbols contributes to quick and reliable identification. The balance/scale usually transfers product mass or product quantity to the label printer. The transferred value is printed with the following information: bar code, pictogram, content, address etc. In laboratory the labelling is performed in a semi-automatic mode, for industry in an automatic one (dynamic scales).
Plus/Minus Control

Plus/Minus Control

Control of sample's mass carried out with reference to specified MIN and MAX thresholds. The weight is considered to be correct if it is comprised within threshold values. A graphic visualisation of weighing result is displayed in a form of a bar graph.
Percent Weighing

Percent Weighing

Percent Weighing function is used for comparision of measured products with mass standard. Mass of a mass standard may be a numeric value taken from a database or it may be determined through a measurement process. Each measured product is compared to mass standard, mass of which is presumed as a model 100% ideal mass. For products weighing less than the mass standard, obtained results are lower than 100%, for products weighing more, the obtained results are greatly  exceeded.
Parts counting

Parts counting

Function using mass measurement for determination of  measured items quantity. Mass of a single item is required for this process. It may be either estimated through weighment or taken from a database. For items counting the following algorithm is used: all items mass / single item mass = quantity. Function operation is supperted by a mechanism of Automatic Correction of Accuracy. This allows to update single item mass in course of the process. To a certain extend Automatic Correction of Accuracy eliminates error which may be a result of different mass values of seemingly alike single elements. For industry solutions items counting may be simultaneously carried out with checkweighing and dosing thus industry solutions feature audio signalling base informing that specified number of items has been weighed. It is possible to apply weighing systems using few platfroms of different MAX capacities and different accuracies.
Statistics

Statistics

Statistiscs function registers and analyses performed measurements. This supplies the user withthe following information: Max and Min standard deviation, average value, variance, range et.
GLP Procedures

GLP Procedures

Diagnostic function allowing to objectively document performed measurements. GLP procedures may be either presented in a short report form or extended one.
Replaceable unit

Replaceable unit

Replaceable units.
ALIBI Memory

ALIBI Memory

"ALIBI" memory enables saving and storing up to 100000 measurements.  Measurements are saved automatically upon each pressing of the key. There is no need for any additional operations or changing settings.
The following data related with the measurements is saved: measurement date; measurement time; result (mass); tare value; operator carrying out the measurement (logged in); product name.
The software saves the measurement in a so called loop, i.e. when the measurement no. 100001 is saved, the measurement 1 gets automatically deleted from the memory.
Measurements saved to balance memory cannot be deleted.
You can preview and print out the data saved to the ALIBI database.
Documentation
Data Sheet Data Sheet
Data Sheet

View
View
Download
Download

Choose more product:
View View DownloadDownload
Software Manual - CBCP 02
View
View
Download
Download
(1.18 MB)
Start up Guide
Start up Guide
View
View
Download
Download
(1.57 MB)
Software Manual - Appendices 02
View
View
Download
Download
(0.99 MB)
User Manual - PUEHX5.EX
View
View
Download
Download
(1.79 MB)
Software Manual - EtherNet/IP communication protocol of PUE HX5.EX
View
View
Download
Download
(2.00 MB)
Software Manual - PUEHX5.EX
View
View
Download
Download
(3.50 MB)
User Manual - HX5.EX
View
View
Download
Download
(2.28 MB)
Software Manual
Software Manual
View
View
Download
Download
(0.93 MB)
User Manual - PM01.EX
View
View
Download
Download
(0.65 MB)
User Manual - PROFINET communication protocol of PUE HX5.EX
View
View
Download
Download
(1.89 MB)
Software Manual - PROFIBUS communication protocol of PUE HX5.EX
View
View
Download
Download
(0.88 MB)
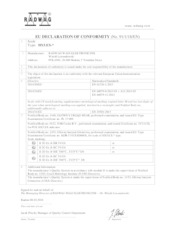
Conformity Declaration
View
View
Download
Download
(0.04 MB)
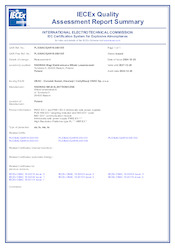
IECEx Quality Assessment
View
View
Download
Download
(0.25 MB)
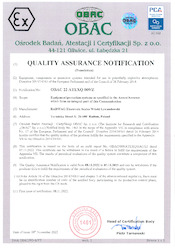
Notyfication of Quality Assurance
View
View
Download
Download
(1.61 MB)
Weighing Solutions for Hazardous Areas
View
View
Download
Download
(13.16 MB)
PUE HX5.EX Weighing Terminal
View
View
Download
Download
(1.70 MB)
Terminals and Platforms
View
View
Download
Download
(3.70 MB)

Newsletter

Subscribe to the newsletter if you would like to receive RADWAG news.

View more
Radwag Balances and Scales
Torunska 5
26-600 Radom
Poland
tel.: +48 48 386 60 00
e-mail: export@radwag.com
TIN: PL7960000327
Vimeo Radwag YouTube Radwag Facebook Radwag LinkedIn Radwag
© 2024 RADWAG Balances and Scales. All rights reserved.

Select language

×
Change language AlbanianAlbanian
Change language DanishDanish
Change language NederlandseNederlandse
Change language EstonianEstonian
Change language FinnishFinnish
Change language HungarianHungarian
Change language IcelandicIcelandic
Change language KazakhKazakh
Change language LatvianLatvian
Change language LithuanianLithuanian
Change language MacedonianMacedonian
Change language NorwegianNorwegian
Change language PortuguesePortuguese
Change language RomanianRomanian
Change language RussianRussian
Change language SlovakSlovak
Change language SlovenianSlovenian
Change language SwedishSwedish
Change language UkrainianUkrainian
Change language SerbianSerbian
Change language MontenegrinMontenegrin
Change language page on Deutsch Deutsch
Change language page on English English
Change language page on Español Español
Change language page on Français Français
Change language page on Italiano Italiano
Change language page on Polski Polski
Change language page on Türkiye Türkiye
Česky
Português (Brasil)
Change website to USA USA
Change language page on 中文 中文
Presentations Presentations Presentations
Subscribe Subscribe Subscribe
Radwag in Facebook Radwag in Facebook Facebook
Radwag in YouTube Radwag in YouTube Youtube
Radwag in Vimeo Radwag in Vimeo Vimeo
Radwag in LinkedIn Radwag in LinkedIn LinkedIn
Webinars Radwag Webinars Radwag Webinars
close
E-mail:
Company name:
Name:
I consent to the processing of my personal data for marketing purposes by Radwag Wagi Elektroniczne Witold Lewandowski.
I consent to receive marketing and product-related messages by electronic means from Radwag Wagi Elektroniczne Witold Lewandowski.
I have read the Privacy Policy of RADWAG Wagi Elektroniczne Witold Lewandowski.
lock_openI want to access the files
close
Slide to go back ↩