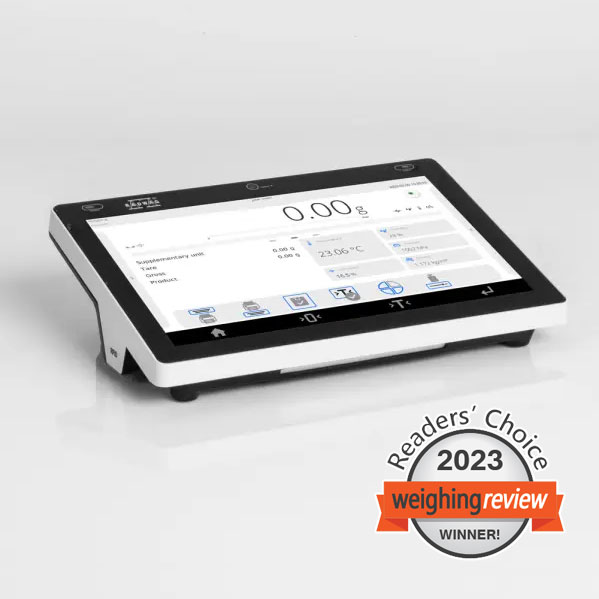
Terminale di pesata PUE CY10
Radwag Bilance e sistemi di pesatura
Selected language Italiano
Terminale di pesata PUE CY10
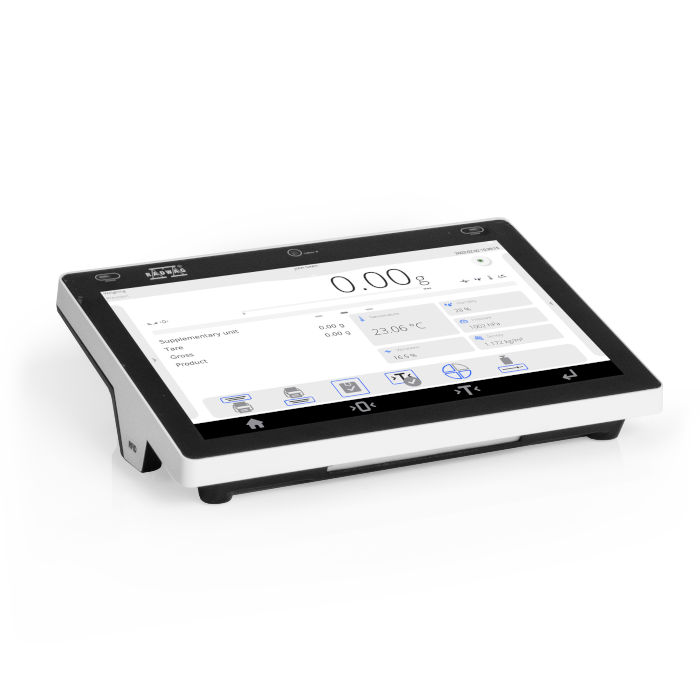
This image is for reference only.

Terminale di pesata PUE CY10

Codice prodotto: WX-008-0217
close
Modifica del modello:
Terminale di pesata PUE CY10
Select all
Vista
Salva
Caratteristiche generali
 

Terminale di pesata PUE CY10

 
The PUE CY10 terminal is the head of the CY10 series precision balances and 1 load cell platform scales. It features a durable housing with an IP 43 ingress protection and numerous communication interfaces, including Ethernet, Hotspot and Wi-Fi® (full list below).


Innovation to Match ELLIPSIS

The PUE CY10 terminal has all the strengths of the 5Y terminal used in the ELLIPSIS series balances, that is:
  • 10-inch display
  • Uncompromised user verification
  • Hotspot - use the balance on any device connected to it. This can be a smartphone, tablet, or computer
  • RFID - allows access to defined capabilities by radio-frequency identification
  • Live Note voice and text notes
  • Voice commands for the device
  • Measurement history within the Handy Library
  • Widgets - prepared to display what you need most at any given moment
  • Ambient Light - the light colour will tell you about status, process results, procedures, or alerts.
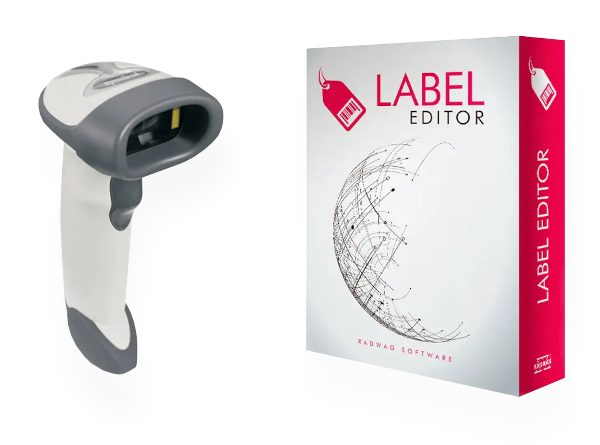


Labeling Scale Functionality

The PUE CY10 terminal has been extended with features specific to labeling scales, as it:
  • Cooperates with the computer program Label Editor R02
  • Is compatible with ZEBRA label printers
  • Supports single labels, bulk labels and bulk from bulk labels
  • Allows import/export of label designs using a pendrive
  • Enables you to assign labels to goods or customers and print a global label.


Software for Special Tasks

The PUE CY10 terminal software has a set of innovative Features that make daily work with the scale easier:
  • Cooperation with up to 2 weighing platforms
  • Updating statistical data separately for each commodity or globally
  • Tare mode expanded to include Dispenser mode capability.


Modbus TCP/IP

is one of the most popular communication protocols in industrial automation. Implementing it in the 5Y balances and CY10 scales makes the devices of this series friendly to automation integrators. 
 
A balance or scale in a Modbus system is a slave device and performs tasks specified by the master device which is most often a PLC. Protocol Modbus TCP/IP in the 5Y balances and C10 scales enables, among other things, the realization of mass readout, zeroing and tare functions of the device, as well as tare settings and MIN and MAX thresholds.


Wi-Fi® is a registered trademark of Wi-Fi Alliance®.
Specifiche
Display

10″ graphic colour touchscreen


Punteggio IP

IP 43


Struttura

ABS + aluminium


Interfaccia

2×USB-A, USB-C, HDMI, Ethernet, Wi-Fi®, Hotspot


Alimentatore

12 – 15 V DC


Consumo di energia

1 A


Quantita massima di unita verificate

10000


Minimum volatge per verification unit

0,4 µV


Maximum voltage per verification unit

3,25 µV


Impedenza della cella al carico minimo

50 Ω


Maximum load cell impedance

1200 Ω


Tensione di eccitazione della cella di carico

5V


Incremento massimo del segnale

19,5 mV


Connessione di celle di carico

4 or 6 wires + shield


Ambiente di lavoro

-10 – +40

 °C

Sistema operativo

Linux


Processore

quad-core Broadcom 1,5 GHz


Memoria

16 GB, 2GB RAM


Multi scala

YES


Numero massimo di piattaforme

max.2


CE
Verifica Extra payment
for verification
Garanzia 2 anni
Video
New Menu Language in 5Y Series Balances: Japanese
PUE CY10 – Modern Technology in Industry
Complete Solutions for Mass Measurement in Pharma Industry
Funzioni
Autotest

Autotest

Diagnostic function aiming at metrological parameters determination (repeatability), the parameters are determined for the actual conditions of use. When speaking of repeatability it may be also used for weighing time optimization. Autotest is operated in an automatic mode thus operator’s time is saved.
Dosing

Dosing

Weighing process for which reference mass has been determined together with tolerance for its determination. Dosing tolerance is given in [%] and it is calculated in relation to the reference value thus being a permissible deviation of this process. This solution is used for weighing powders, liquids and loose materials. Dosing function performance is often supported with bargraph - load indicator. For industrial scales it is possible to use a control systems of dosing process.
Percent Weighing

Percent Weighing

Percent Weighing function is used for comparision of measured products with mass standard. Mass of a mass standard may be a numeric value taken from a database or it may be determined through a measurement process. Each measured product is compared to mass standard, mass of which is presumed as a model 100% ideal mass. For products weighing less than the mass standard, obtained results are lower than 100%, for products weighing more, the obtained results are greatly  exceeded.
Parts counting

Parts counting

Function using mass measurement for determination of  measured items quantity. Mass of a single item is required for this process. It may be either estimated through weighment or taken from a database. For items counting the following algorithm is used: all items mass / single item mass = quantity. Function operation is supperted by a mechanism of Automatic Correction of Accuracy. This allows to update single item mass in course of the process. To a certain extend Automatic Correction of Accuracy eliminates error which may be a result of different mass values of seemingly alike single elements. For industry solutions items counting may be simultaneously carried out with checkweighing and dosing thus industry solutions feature audio signalling base informing that specified number of items has been weighed. It is possible to apply weighing systems using few platfroms of different MAX capacities and different accuracies.
Peak hold

Peak hold

Function registering the greatest temporary indication occurring in course of the weighing process. It is most often used in medical scales in order to hold the measurement indication.
Formulation

Formulation

Function supporting the mixture making process, wherein the mixture contains various components. Formulation function usually uses the balance/scale database of components. Formulation serves for monitored checkweighing of every single component with a given tolerance. It is enriched with a set of individual settings.
Statistics

Statistics

Statistiscs function registers and analyses performed measurements. This supplies the user withthe following information: Max and Min standard deviation, average value, variance, range et.
Checkweighing

Checkweighing

Checkweighing function is used for checking whether the measured sample mass is within the predefined threshold values, Low [LO] and Hgh [HI]. The thresholds are given in [g] and [kg] units. Current state of a sample being measured is signalled by means of pictorgams located on a display for laboratory balances, for industrial scales Stackligt System is used. This visual +/- inspection is in operation during segregation, control or packing process of products for which mass has bees determined with a specifaied tolerance, eg. 12860 g 961
IR sensors

IR sensors

Programmable function supporting the weighing process through control of the following options: sliding weighing chamber doors, printout, zeroing, tarring etc. Especially appreciated wherever preventing the balance from soiling is important.
GLP Procedures

GLP Procedures

Diagnostic function allowing to objectively document performed measurements. GLP procedures may be either presented in a short report form or extended one.
Animal weighing

Animal weighing

Process of mass determination for a product which may unwillingly reposition within the weighing pan. Mass determination in such cases requires much longer period of time when compared to typical weighing process. It is the user who defines period of time needed for control of measured product mass. The user can thus optimize the function depending on the measured product characteristics.
Pipettes Calibration

Pipettes Calibration

Function verifying correctness of piston pipettes functioning, the verification is performed via gravimetric measurement of the excreted liquid. Pipettes calibration may be either a stand-alone module or it may be operated
Air density correction

Air density correction

Function performing correction of mass measurement indication, wherein the air density is taken into account. It is used in balances with reading unit < 0,01 mg.
Density determination

Density determination

Liquid or solid body density function uses the Archimedes principle and it requires a special kit to be applied. The kit when used, replaces a weighing pan. For solids mass of the sample must be determined first in the air, next in the liquid of specified density. For liquids the so called sinker, density of which has been determined, must be measured first in the air, next in the tested liquid. The density determination process is disturbed by air bubbles which may stick either to the measured sample or the sinker. In case of laboratory equipment very light solids may be measured. For industry, solid bodies density may be determined by means of  under-pan weighing. Tested load of significant size may be measured this way.
Differential weighing

Differential weighing

Differential weighing informs about mass variation a particular sample, wherein the said variation is a result of manufacturing processes.

Differential weighing is often applied in product control process, for which reference product parameters have been specified in order to be used as a source of comparison for the whole series.
Insuchcasestandard deviation is the information which tells about quality and completeness of a final product. For systems based on a feed-back technique such information may be used by control units.
Ambient conditions monitoring

Ambient conditions monitoring

The possibility of cooperation with the THBR 2.0 system
Statistical Quality Control

Statistical Quality Control

Statistical control for determination of basic statistical criteria: maximum, minimum, standard deviation, mean values for each batch, etc.
Packaged Goods Control

Packaged Goods Control

Pre-packaged Goods Control mode enables to collect weighings from RADWAG-designed weighing instruments, carry out control and generate PGC reports. Different types of weighing instruments can be combined into a network. The control can be started on a balance or via computer software. It is automatically finished after a respective quantity of packages is verified.
Collected data allows you to assess quality of produced pre-packaged goods and their conformity with:
- internal quality control system;
- 'Pre-Packaged Goods' regulation of 7th May 2009 (Journal of Laws No 91, item 740), on the requirements concerning quantity inspection of pre-packaged goods control, which inspection is to be carried out by means of random selection of the measurements results and sending those results to pre-packaged goods control procedure.
ALIBI Memory

ALIBI Memory

"ALIBI" memory enables saving and storing up to 100000 measurements.  Measurements are saved automatically upon each pressing of the key. There is no need for any additional operations or changing settings.
The following data related with the measurements is saved: measurement date; measurement time; result (mass); tare value; operator carrying out the measurement (logged in); product name.
The software saves the measurement in a so called loop, i.e. when the measurement no. 100001 is saved, the measurement 1 gets automatically deleted from the memory.
Measurements saved to balance memory cannot be deleted.
You can preview and print out the data saved to the ALIBI database.
Wi-Fi®

Wi-Fi®

Thanks to wireless communication between the computer and a balance, it is possible to use a balance inside a laminar flow hood and a fume cupboard.

Documentazione
Data Sheet Data Sheet
Data Sheet

Vista
Vista
Salva
Salva

Choose more product:
Vista Vista SalvaSalva
User Manual
User Manual
Vista
Vista
Salva
Salva
(1.94 MB)
User Manual
User Manual
Vista
Vista
Salva
Salva
(1.24 MB)
Software Manual
Software Manual
Vista
Vista
Salva
Salva
(1.23 MB)
Start up Guide
Start up Guide
Vista
Vista
Salva
Salva
(3.12 MB)
CY10 Software Manual
Vista
Vista
Salva
Salva
(4.07 MB)
Software Manual
Software Manual
Vista
Vista
Salva
Salva
(0.95 MB)
Conformity Declarations
Vista
Vista
Salva
Salva
(0.04 MB)
RFID
RFID
Vista
Vista
Salva
Salva
(0.68 MB)
Hybrid Protective Glass
Vista
Vista
Salva
Salva
(1.86 MB)
Terminals and Platforms
Vista
Vista
Salva
Salva
(3.70 MB)
Accessori
Tag RFID

Accessori

Radwag bilance e sistemi di pesatura
Torunska 5
26-600 Radom
Poland
tel.: +48 48 386 60 00
e-mail: export@radwag.com
TIN: PL7960000327
Vimeo Radwag YouTube Radwag Facebook Radwag LinkedIn Radwag
© 2024 Radwag bilance e sistemi di pesatura. Diritti riservati

selezionare

×
Change language AlbanianAlbanian
Change language DanishDanish
Change language NederlandseNederlandse
Change language EstonianEstonian
Change language FinnishFinnish
Change language HungarianHungarian
Change language IcelandicIcelandic
Change language KazakhKazakh
Change language LatvianLatvian
Change language LithuanianLithuanian
Change language MacedonianMacedonian
Change language NorwegianNorwegian
Change language PortuguesePortuguese
Change language RomanianRomanian
Change language RussianRussian
Change language SlovakSlovak
Change language SlovenianSlovenian
Change language SwedishSwedish
Change language UkrainianUkrainian
Change language SerbianSerbian
Change language MontenegrinMontenegrin
Change language page on Deutsch Deutsch
Change language page on English English
Change language page on Español Español
Change language page on Français Français
Change language page on Polski Polski
Change language page on Türkiye Türkiye
Česky
Português (Brasil)
Change website to USA USA
Change language page on 中文 中文
Presentations Presentations Presentations
Subscribe Subscribe Subscribe
Radwag in Facebook Radwag in Facebook Facebook
Radwag in YouTube Radwag in YouTube Youtube
Radwag in Vimeo Radwag in Vimeo Vimeo
Radwag in LinkedIn Radwag in LinkedIn LinkedIn
Webinars Radwag Webinars Radwag Webinars
close
E-mail
nome azienda:
Nome:
I consent to the processing of my personal data for marketing purposes by Radwag Wagi Elektroniczne Witold Lewandowski.
I consent to receive marketing and product-related messages by electronic means from Radwag Wagi Elektroniczne Witold Lewandowski.
I have read the Privacy Policy of RADWAG Wagi Elektroniczne Witold Lewandowski.
lock_openI want to access the files
close
Slide to go back ↩